Welcome! This is a way for me to share about my experiences as they relate to myself, family, health, compassionate cooking, baking and yoga. Enjoy!

Monday, July 22, 2013

French Toast Casserole

Mr. Chevy
With the introduction of our newest family member, a little rescue pup named Chevy, finding time to make breakfast beyond cereal or toast are a thing of the past for the time being.  Meals that are quick and ready to go are just what I need since Chevy has all kinds of energy after resting all night.  Prior to our vegan gluten free transformation, we used to make a french toast bake with fruit and I had been thinking about trying a version that would work for our family.  So with this in mind, and wanting to make a real breakfast again, I set out in search of a comparable recipe.  My search wasn't turning much up that looked interesting and I was beginning to think another boring breakfast was on the horizon, but wait, here's an intriguing site called Kitchen Grrrls.  With hope, I clicked the link and viola, there is was, the recipe I was searching for.  My mouth started watering looking at their pictures and reading the recipe so I headed to the kitchen at 10:00pm to assemble the next morning's wonderfulness.  With a few tweaks of ingredients to fit my families needs, I put breakfast together in no time.  I even pre-washed the blueberries and mixed all the dry ingredients for the topping the night before, I'm not messing around with having to take my eyes off a 3 month old potty training chew happy puppy in the morning.

Chevy thinking he's
 tackling Mya
One of the tweaks I made was to use gluten free bread by Ener-G.  This is a firmer bread that I thought might hold up better since it needs to soak up lots of liquids.  I really wasn't sure how this would turn out using the GF bread, but with my and Kitchen Grrrls fingers crossed, I gave it a try.  The next morning, I whisked some water with the dry topping ingredients that were ready and waiting for me from the night before, spooned it on top and popped the entire casserole in the pre-heated oven.  Since now all I had to do was wait for the oven to do the work, I grabbed my cup of coffee and was entertained by Chevy and Mya playing for the next hour.

It was like a scene from a fairy tale, as the timer beeped, my beautiful princesses awoke, quite possibly from the amazing smells wafting from the kitchen.  It looked just as I hoped.  As much as it was torturing us, I allowed it to cool for about 15 minutes.  With the french toast finally on our plates, we drizzled some pure maple syrup on top, took our first bites and we were not disappointed!  It was so good, there was not a bite left on our plates.  I thoroughly enjoyed the recipe, but next time I might switch out the ground flax for ground chia seed just to see how it turns out, what can I say, I like to experiment!


French Toast Casserole


Ingredients:

1 loaf GF bread of choice, should have 12 pieces
3 c. nondairy milk
1/3 c. ground flax seed
1 tsp. cinnamon
2 Tbsp. agave
1 Tbsp. pure vanilla extract
pinch of Himalayan pink salt


Middle layer:
1 banana, sliced thin
1/3 c. coconut sugar
1/3 c. chopped pecans (pumpkin seeds would work if you have a nut allergy)
2 Tbsp. quick cooking GF oats
1/4 tsp. cinnamon
2 Tbsp. pure water


Topping:
2/3 c. coconut sugar
2/3 c. chopped pecans (again, pumpkin seeds if needed)
1 tsp. cinnamon
1/4 c. quick cooking GF oats
1/4 c. pure water
20-40 organic blueberries (we like blueberries so we used 40)

Directions:
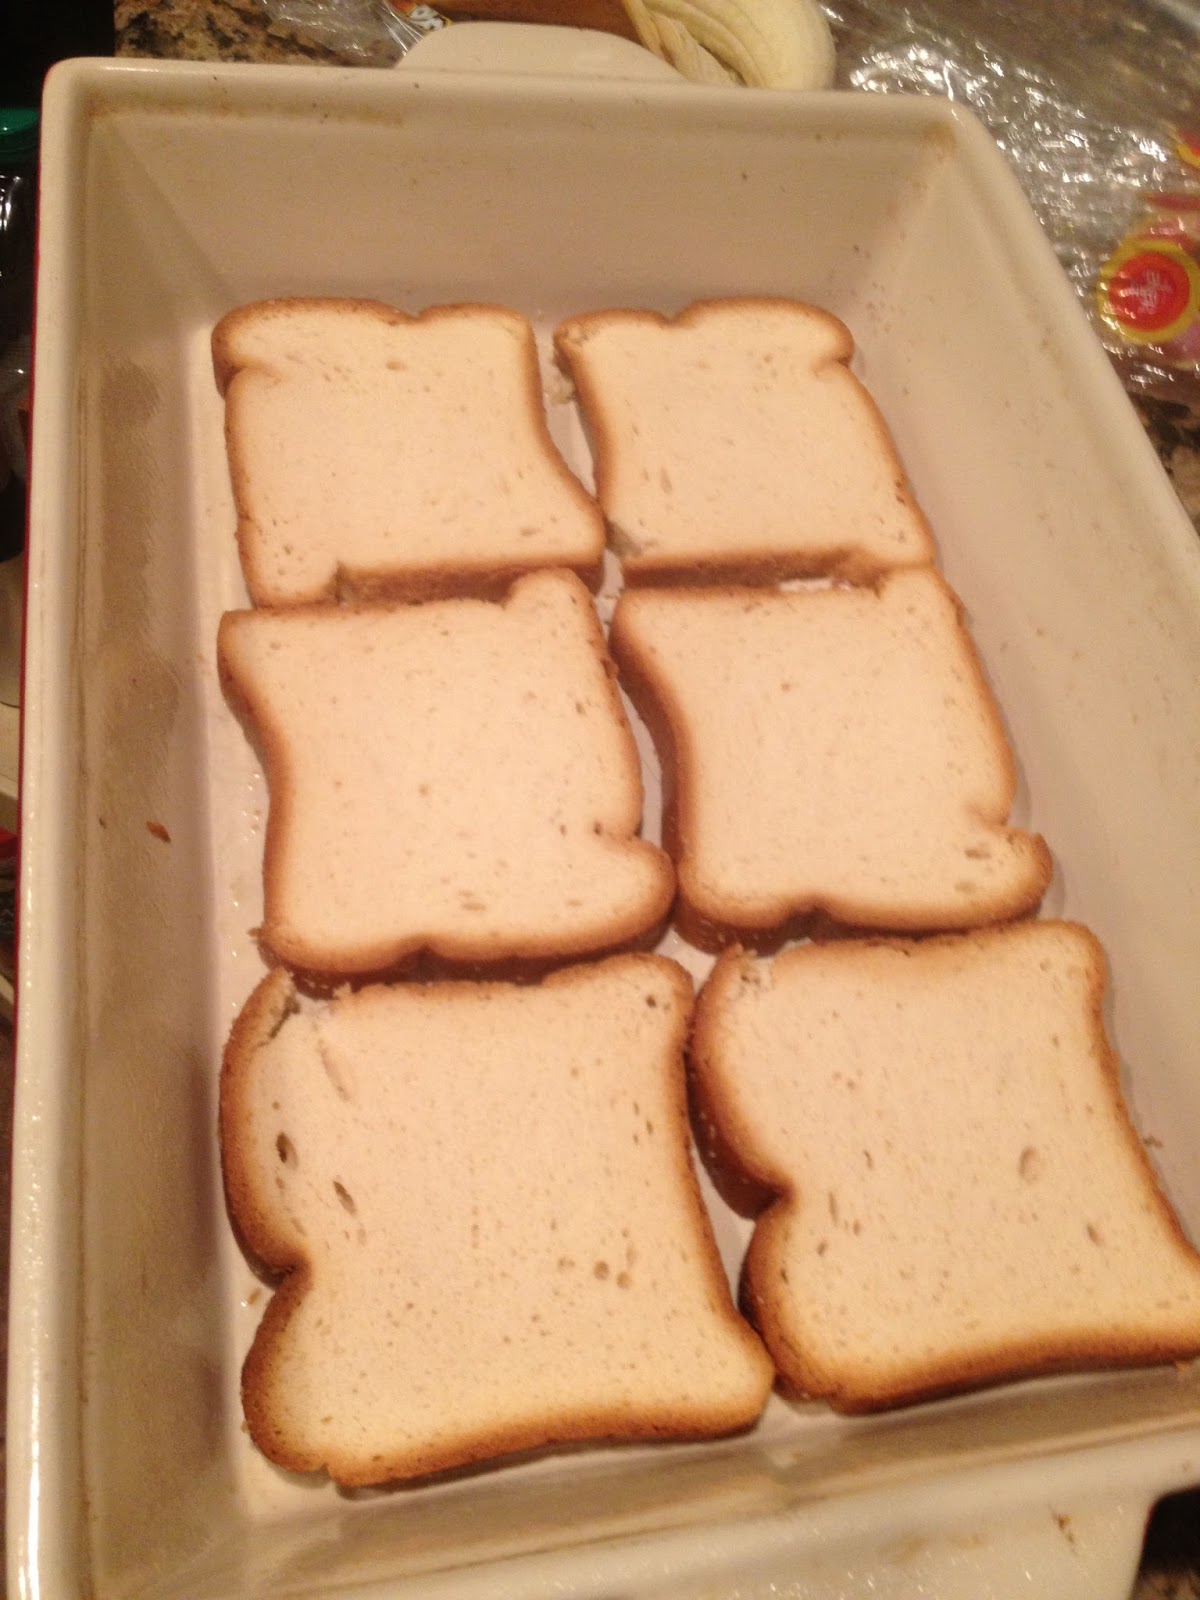
1.  Spray casserole dish and lay six pieces of bread in dish.
2.  Mix milk, flax, cinnamon, agave, vanilla and salt, set aside.
3.  Mix middle layer ingredients but not the banana.  Spoon a little bit of mixture on each piece of bread, then place banana pieces on top.
4.  Place the other six slices of bread on the middle mixture.
5.  Gently pour milk mixture over entire dish, making sure all pieces of bread got wet.  Cover with plastic wrap and place in the fridge.
6.  Wash and dry blueberries, place in closed container.
7.  Mix all dry topping ingredients, do not add water until morning.  Place in closed container.
8.  Go to bed :)
9.  In the morning, preheat oven to 350, add water to dry topping ingredients, spoon mixture on top of prepared bread, covering each top piece, sprinkle blueberries over top.
10.  Place in oven for 1 hour, you may need an extra 10 minutes depending on the bread used, check to
make sure the topping isn't burning.  Once done, remove from oven and allow casserole to sit 10-15 minutes.
11.  Serve with some warmed pure maple syrup and enjoy!


*Store left overs (if there are any) in foil in the fridge, place back in oven to reheat.

Tuesday, July 9, 2013

Pass It On!


I firmly believe that everything happens for a reason and am often amazed at how connected people and events are.  I have been practicing yoga for almost 20 years and, about three years ago, my mom mentioned that a local yoga studio offered teacher training to become a certified yoga instructor.  I was instantly intrigued and signed up for the intense 11 month course.  200 hours, several tests, student teaching, numerous books and classes later, I was officially a yoga instructor.  What I walked away with was life changing, but the most incredible thing that occurred was having my eyes opened to the effects foods and drinks have on our body, mind, earth and other beings.  I have loved animals since I can remember so the compassion connection was a no brainer for me.  When hearing how influential foods and drinks are physically, what seemed like a normal and natural diet, now was so obviously inappropriate and unnecessary.

So, up until a few years ago, I was living in blissful ignorance, consuming the SAD diet (standard American diet).  Yes, I would eat fruits, veggies, nuts and grains, but everything was centered around animal flesh and fluids.  When I would have sweets, they were made with hydrogenated oils, butter and damaging sugars.  Let's not forget all the wonderful preservatives, chemicals and dyes that I also was exposing myself to.  It's no wonder why, at a young age, I was suffering from rheumatoid arthritis, lupus and multiple auto-immune disorders.  Once learning the truth, there was no way I could continue on my path of destruction.  I started researching and taking courses in plant based nutrition.  The more I learned, the more I felt in control of my life.  Gone were the days of not being able to use my hands or walk because the pain that was previously limiting me was disappearing.  Even more rewarding was the fact that at my doctors appointment to check my blood work, the doctor thought part of my record was missing since I hadn't been in for a visit in over two years.  I couldn't help but beam like a proud parent when I answered, "yes, that is correct, I haven't been here in that long."  As if things couldn't get better, a week later I was given the results that all of my blood work was normal, no protein, vitamin or mineral deficiencies.  Did I mention, while on a SAD diet, I had multiple deficiencies?

I cannot even begin to explain how grateful I am to those that have positively influenced me in helping to find the path that I am now on.  If these people were too afraid to go against the "norm" and not speak out against the SAD diet and animal cruelty, then I would still be living my blissfully ignorant life and still be struggling to get through my days without pain or medication.  For this very reason, I feel compelled to share information with others because most people also live in blissful ignorance.  My goal is not to seem pushy or judgmental, rather, quite the opposite.  I do not feel I am better than omnivores, I simply feel I am making smarter choices for my and my families life.  Although, the way we live may not be 100% fool proof from cancer or disease, if I know things can trigger certain problems, especially those that may seem to run in the family, then why wouldn't I take the necessary steps to help prevent them?  Giving my children and myself a better chance of leading a healthy life well into our senior years by eating a plant based diet can only be viewed as a good thing.  In my life, if I have positively influenced one person to make changes for better health then it is worth the many that I may irritate by my blogs or comments on Facebook and Twitter.  The message I hope to spread is when you learn something that creates positive change, don't be afraid to Pass It On!


Wednesday, June 5, 2013

Sugar and Spice and Everything Nice?


Although we've been a plant based family for three years now, we are constantly growing as we move towards more and more whole foods while using less and less processed. Gone are the days of packaged granola bars full of preservatives, dyes and refined sugars.  Now, if we want a bar, we make them with whole foods and more nutritionally sound sweeteners.  If we are out and about and really need a fix we stop at the nearest grocery store and grab a Larabar since they use only whole ingredients and are very similar to the ones we make at home.  For those with nut allergies, you can easily make them using pumpkin, sunflower or hemp seeds (raw of course).

With our journey into a healthier lifestyle we still like our treats, so I decided to explore new ways to bake sweets using ingredients that actually provide nutrients instead of using ones that provide disease.  For about six months now, we have eliminated refined sugar (even organic sugar is still sugar with zero nutrients).  The difference in how we feel and act is incredible!  I can also gauge this difference even more when, on the rare occasion we visit our favorite allergy friendly bakery, the girls will get a gluten free vegan sugar cookie and within minutes there is a noticeable change in their behavior.  Just as with fried foods, once in awhile is fine, everyday day or even week is detrimental.

The sweeteners we have been using in ALL our baking and/or cooking are raw agave, stevia or coconut sugar.  All three of these are great choices for everyone, but especially those with health issues such as diabetes.  The three mentioned will not spike blood sugar the way refined sugars do.  Alternatively you can also use fruit/vegetable purees, dates and raisins.  I like using the fruit/vegetable purees in pancakes, waffles and muffins along with the coconut sugar.

Benefits:

Agave:
  • Low on glycemic index
  • Accommodates calcium absorption
  • Lower in calories than conventional sugar
Stevia:
  • Completely plant sourced so no man-made carcinogenic chemicals
  • 300x's sweeter than conventional sugar so a little goes a long way
  • Zero carb
  • Zero calorie
  • Accommodates calcium absorption
  • Antibacterial properties
  • Low on glycemic index
Coconut Sugar:
  • Sourced from the blossoms of the coconut
  • Low on glycemic index
  • Contains numerous vitamins and minerals (so many that I'm not going to list them all)
  • Contains amino acids
  • Shows promising results for those suffering with chronic illness or disease (diabetes, cancer, heart disease, gallstones, obesity).  
When substituting agave you can do it 1:1, but since it is liquid you may need to adjust the liquid in the recipe so you're not left with a gooey mess.  Stevia comes in liquid or powder and you never want to use 1:1 when subbing or you will send your taste buds into a frenzy (here is a great link for how to sub stevia).  Coconut sugar comes in crystal form just as the conventional sugars do and looks very similar to brown sugar.  Subbing coconut sugar can be done 1:1.  We love the results from using coconut sugar and I now order it through Amazon as it's a lot cheaper that way.  When buying Agave I head to Costco because they sell it in a two pack (the larger bottles too!) for the price you would pay for one small bottle at your local grocery store.

Do not use the old excuse, "it's too expensive" to do the switch.  As I've said many times before, the little extra costs for some things actually pays off in the long run because you end up with less doctor visits and less pharmacy visits. 

I have remade every recipe in this blog that called for sugar using coconut sugar and we loved every one.  Search through old posts for some of your favorites (cookies, muffins, waffles, oatmeal, etc) and do the switch to see for yourself.  The taste is amazing and I bet you notice a difference in how your body feels after eating treats made with healthier options.  

Monday, May 13, 2013

Say What?


So today's topic may freak some of you out, but it needs to be discussed so here goes... On my journey towards expanding my wellness knowledge, I was required to learn more about the pH level in our bodies.  Say what? you might be saying, which is exactly what my children said when I asked them to pee on a strip of pH paper.  

I'm sure most of you are aware of how swimming pool and hot tub owners need to test the water often to ensure the proper pH level.  Otherwise, nasty things can throw off the waters pH and create that not too pleasing color in the water.  Well it only makes sense that the same thing happens in our bodies, we just don't "see" the unpleasing color as easily.  Our bodies are incredible machines that try so hard to compensate for the damage we bombard it with.  By damage I do mean the foods, beverages, stress, lack of sleep and environmental chemicals we insist on maintaining.  This is where all those wonderful symptoms, diseases and illnesses come into play.  The symptoms are the warning signs that we, all too often, ignore and pass off as getting older or claiming it's hereditary.  If you're truly happy with those answers, and don't want to get to the root of the problem that is actually creating the issues, then by all means, continue on your merry way.  However, if you decide to take control of the issues by acknowledging that what happens inside your body is a direct result of the choices you are making, then the first step is to go to your local health or natural food store and purchase pH strips, also known as litmus paper (you can order them through Amazon too).  

Breaking it down simply, all foods fall within a pH range of 0 - 14.  The lower end is acidic, the higher end is alkaline.  The ideal range you want your body to be in is around 6.5 - 7.5.  When you fall below 6.5 this means your body is becoming too acidic and this is a big problem.  Even those that seem fit should still test their urine with a pH strip.  Looking in shape on the outside does not mean you are on the inside.  Taking a few seconds to test your pee every week is well worth it instead of becoming the next story that we often hear about, "so and so was such an athlete, I can't imagine why they died suddenly from a heart attack".  

Some of you may be thinking that it's weird or gross to hold a strip of paper under you to allow a few drops of urine to fall on it.  It's no different then when you have to pee in a cup at the doctors and I honestly think it's weird that people think it's normal to get sick and suffer from diseases.  To me, spending thousands of dollars on doctors visits, medications and surgery is weird because all that is, is a band-aid on the issue unless you get to the underlying cause of what created all the chaos to begin with.  

So how, pray tell, do we get our bodies less acidic and more alkaline?  Many factors come into play, but keeping things simple, the biggest area you can change immediately would be by what you are putting into your body.  Plant based foods are alkaline and healing, whereas animal based foods and processed foods are highly acidic and damaging.  You don't have to take my word for it, just do the pH test and you can see for yourself if your choices are causing damage or health.  Then you can decide if you want to change your potential outcome or not.  

I plan on remaining "weird" by continuing to have my family test their pH levels consistently.  Not only is this a great science lesson for them, but it also allows me to gauge their health.  I was happy to find that all of my kiddos and my pH levels were well within the ideal range.  Knowing I am giving my children the best possible health is the most satisfying feeling ever.  As they get older, they will have the tools necessary to make informed choices regarding their health and that is basically what health comes down to... choices.  

Thursday, May 2, 2013

Bargain Prices


The other day, while driving through town, I looked at the signs hanging in various food establishments.  One bragged that their "meal", which included chicken or burger, fries and a drink, was only $1.99, another couldn't post enough signs about their $.99 burgers.  Knowing full well that to produce animal products is not a cheap process, it made me feel sorry for all those people who are not aware of how or why this happens.  I won't bore you with the details of how those in power (government and corporate) manipulate issues in order to provide Big Ag with millions of dollars to subsidize specific food sources so that those foods can be offered at cheap rates through grocery stores and food establishments (if you want more info on that check out ewg.org).  Even more disheartening is the fact that people are truly grateful these meals are offered and then feel healthier options are too pricey.

Looking at the entire picture, it becomes easier to see that these bargain prices are not actually what they seem and end up costing people thousands of dollars in medical bills and drugs.  To break it down simply, consuming these bargain foods cause illness and disease in the form of heart disease, stroke, cancers, diabetes, auto-immune disorders, ADHD, Autism, skin disorders, high cholesterol, high blood pressure, mental disorders, intestinal disorders, the list goes on and on.  Eliminating the bargain priced meats, dairy and processed foods and replacing them with whole grains (quinoa, gluten free oats, organic brown rice), mostly organic fruits and vegetables, legumes, nuts, seeds and beans is obviously a smarter choice for health and money reasons.  If you eliminate the unhealthy items you would be freeing up money to spend on the healthier options.

If this isn't enough to get people curious, then consider it a quest to see how you feel by eliminating the unhealthy choices and replacing them with the healthier ones for just three weeks.  If you're feeling really adventurous, keep a journal of what you eat and how you feel each day/night.  To make things even more exciting you can make a list of your favorite foods and switch ingredients out to make it healthier.  Little changes make big impacts.  Use non-dairy milk where it calls for cow's milk, add a handful of organic spinach to your smoothie and blend away, more likely than not, you won't even notice a change in taste.  There are many websites that offer tons of amazing recipes that will have your taste buds dancing for joy.  Some of my favorites are kriscarr.comhealthyblenderrecipes.comvegweb.compeasandthankyou.com.

So instead of taking the "easy" route of drive through disease in a bag, drive your wonderful self to the grocery store or farmers market and stock up on foods that will make your life truly easier in the long run.

Wednesday, March 27, 2013

Kids Nutrition Part 3


I woke up yesterday, prepared my morning Yogi tea and then was greeted by my youngest who promptly told me that she would be leading me in my morning yoga practice.  Let me know tell you, it was the best yoga practice ever!  We did every animal pose imaginable and some new ones that I had never heard of :)  My body, mind and heart were soaring the rest of the day.  

Being a yoga instructor, it's only natural that all three of my children have experienced yoga and know many poses.  They may not practice yoga everyday, but they each do yoga several times a week.  I have taken this a step further by including them in most of my classes by being my assistants.  This not only gives them a sense of responsibility, but also allows other children their age to see yoga being practiced.

There are endless forms of physical activity for children to participate in such as soccer, gymnastics, volleyball, karate, I could go on and on (see suggested list at the end).  My children are also involved in other activities as well, however, it is interesting to see the connection between yoga and the other activities.  Yoga allows my children to perform their other sports with ease and, although my kiddos have loads of energy, yoga gives them the tools to quiet their minds when they need to concentrate.  

Keeping children physically active benefits their bodies and minds.  Without using all the medical mumbo jumbo, it works their musculoskeletal system which affects their muscles, bones, joints, tendons, ligaments and nerves.  So basically, every inch inside and out of the body is impacted by being physically active, allowing them to stay sharp physically and mentally.

Activities combined with a proper diet sets children up for the best possible healthy future.  Put your energy into prevention instead of battling disease and illness.  Even if you feel your family is predisposed to certain disease, you hold the key to keeping those genes turned off by staying active and focusing the family diet to be centered around whole foods.   Whole foods include vegetables, fruits, whole grains, nuts, seeds and legumes.  Do your family a favor by avoiding processed foods, refined sugar, refined flour, refined oil, artificial dyes, artificial colors, fats from animals and limiting or eliminating animal protein.  By doing this you will not only be saving your children's health but you will also be saving money by not visiting the doctor, hospital or pharmacy.  The money that would have otherwise been spent on curing can be spent on enrolling your children in a new activity.

Eating a varied whole foods diet gives children all the protein, calcium, iron, omega 3's and other vitamins and minerals that they need to develop.  Supplements and vitamins can be a healthy addition, so long as they are not used to take the place of eating healthy.  As a vegan/vegetarian family we take B-12 since that comes from microorganisms that typically get washed away from the foods we eat thanks to our germ-a-phobic society (unless you are eating animals which, by the way, only contain B-12 because of the grass and soil they have eaten :)  Children can also take a multivitamin to reinforce their growing bodies and have your mind rest at ease.  Probiotics is another important factor to consider.    Probiotics are the good bacteria guys that help the body get rid of the bad bacteria guys.  Having a healthy digestive system keeps the entire body working properly and disease free.  Probiotics can be acquired by eating yogurt (preferably non-dairy), fermented foods (tempeh, pickled veggies, miso, sauerkraut) or taking a probiotic supplement.

Children deserve the best future possible and that comes from setting them up with healthy habits that last a lifetime.

Budget Friendly Activities
1.  Take a family walk or hike - turn it into a picnic by bringing a backpack full of healthy energy sustaining foods and drinks.
2.  Buy a box full of sidewalk chalk  - set them loose on the driveway or sidewalk.  Don't worry, everything is washable, even the kiddos.
3.  Make some eco friendly bubbles  - they can help make the recipe and then have fun blowing bubbles.  Make it more active by having them run around trying to pop them all before they hit the ground.
4.  Check out the inexpensive summer toys at Target, Walmart or The Dollar Store - look for ones that involve the whole family such as baseball, volleyball or badminton.  If you don't have enough yard space, head to the local park for a game or two.
5.  Depending on the age of your children - contact local pet stores or animal shelters to see if they need volunteers to walk dogs or play with any of the other animals.  This is something an adult and child could do as a team effort.
6.  Volunteer with the city to pick up garbage around the city or at parks - not only are they being active  but it's a great way to teach the idea of "giving back".
7.  Create Little Chefs - get them in the kitchen with you and have them help create tasty healthy snacks and drinks.  

Wednesday, March 13, 2013

Kid Nutrition Part 2


Striving to have your children eat a rainbow every day is one of the best ways to show your kids how much you love them.  A fun tool to get them motivated is Wegmans chart. To some my view may seem pushy or judgmental regarding nutrition but, when evidence is laid out in front of you and common sense is applied but you ignore it then I become extremely passionate about the subject, especially regarding children.  Often people don't realize that what they are, or aren't, feeding their children is actually setting them up for health failure.  Once people do learn, and then continue to allow the SAD (Standard American Diet) diet to rule their family, then I do not understand complaining when medical visits, bills or diseases start taking a toll.  This may sound harsh, but I feel that if someone learns the proper nutrition needed to better arm their child(ren) for a healthy future. but still do nothing to implement that, then the caregiver is a major factor in them developing very preventable diseases.  Visit http://www.tcolincampbell.org for more details regarding preventable diseases.

Not to say that 100% of illnesses are avoidable, however, studies show upwards of 90% of chronic diseases are, and this is through proper nutrition beginning as early as possible.  To help drive this message home, and allow yourself to gain a better understanding, I highly recommend that every parent/guardian purchase Disease-Proof Your Child, Feeding Kids Right by Dr. Joel Fuhrman.  Dr. Fuhrman details the reasons why nutrition is so important and how to accomplish this.  He also gives some easy and tasty recipes at the end of the book.  (*Note - he does use tofu, which we also limit due to it being heavily processed - tempeh is a better choice, and whole foods is the best choice).

Relax, I'm not saying everyone has to become vegan, however, the less amount of animal products you consume, the better.  The less amount of processed foods, the better.  Although my children and I are vegan, I freely state that two of my children were vegetarian for the first few years, rather than vegan.  My husband is vegetarian, not vegan.  In avoiding animal products I feel I am giving my children the building blocks as to how, and why, we live the way we do.  Our family has seen first hand how eating plant based and gluten free has relieved our celiac disease, allergies, skin issues and my rheumatoid arthritis, lupus, and it has eased sjogren's syndrome.  Making the transition from the SAD (I seriously did not make that acronym up, I promise) way of life to a more plant based life is possible, and most animal foods are now available in vegan form.

Using faux meats can make the transition easier but, everyone - omnivores, plant based, vegetarians and vegans - need to be careful to avoid eating too many processed alternatives (i.e. faux meats, cheese, snacks, etc.).  Processed foods and drinks in any form lack nutrition, and should be kept at a minimum.  Exposing children to the amazing flavor of whole fruits, veggies and grains at an early age sets the stage for them being able to actually enjoy those health filled foods instead of scrunching up their noses.  Dousing veggies with oils, dressings or cheese is not the answer either.  To transition out of this habit start cutting back on how much oil, dressing or cheese you are using.  Each time they are exposed to more of the vegetable flavor, their taste buds will begin to adjust and, at some point, you will only be steaming the veggies and adding spices as flavoring enhancers instead of masking the true vegetable flavor.  As for meats, once you have transitioned using compassionate meats (faux meat alternatives), then start to gradually replace those by using whole grains and foods such as quinoa, organic brown rice, lentils, beans and mushrooms, and only use faux on occasion.  Just as those who consume the Standard American Diet do, adding spices of all kinds can be used with your plant based meals to create delicious recipes, not to mention the health benefits herbs and spices offer.

Speaking of recipes, let's get started...

Universal Avocado Dip (my youngest child's absolute favorite thing!!)

Ingredients:
1 ripe avocado (cut in half and pit removed)
1/2 Tbsp. pure lemon juice
1/2 -1 tsp. real sea salt or himalayan pink salt
1/4 tsp. black pepper or chili powder

Directions;
1.  Squeeze each avocado half so that the fruit comes away from the skin and allow fruit to fall into a bowl.
2.  Mash avocado with a fork or spoon and then add lemon juice, salt and pepper.
3.  Mix well and serve.

Tip = for a really smooth dip, place all ingredients into a food processor and blend.  Dip veggie straws, Beanitos (great alternative for those allergic to corn), sprouted tortilla chips or veggie slices (my favorite is sliced cucumbers).  You can also use as a condiment in place of mayo.


Lentil Taco's

Ingredients:
1 c. brown/green lentils (will yield about 2 cups cooked)
2 c. pure water
1 c. finely chopped mushrooms of choice (cremini, bella, etc)
1/2 c. chopped walnuts (optional)
1/2 c. onion, chopped
2 Tbsp. tamari (GF soy sauce) or soy sauce
1 tsp. chili powder (this is kid friendly, or if you're like me and can't tolerate too spicy, feel free to add more to suite your taste)
1/4 tsp. ground cumin
1/4 tsp. garlic powder
12 organic hard taco shells (cook according to package directions), soft taco's or extra greens for a taco salad
optional add in's - vegan sour cream, vegan cheese (Daiya or Follow Your Heart make great vegan shreds, but we actually like to buy their block version and shred it ourselves), organic greens, tomatoes, avocado, salsa.

Directions:
1.  Rinse lentils then place lentils and water in a pot, bring to a boil, cover and reduce heat and cook on low 20-30 minutes until water is absorbed.
2.  While the lentils cook start chopping veggies.  Heat large skillet over medium heat for a few minutes.
3.  Add onions, cook 1 minute then add mushrooms and walnuts (the mushrooms will release liquid and the nuts will release oil to help cook the onion instead of adding oil).  Cook mixture until onions are soft and mushrooms are well browned.
4.  Add tamari and all spices, mix well then add all the lentils, mix again.
5.  Cook mixture about 5-10 minutes on low to heat through, while this cooks prepare taco shells.

Tip - when using mushrooms, prior to cooking or chopping, remove stems and gently scrape out the gills that are on the inside, this removes the bitter taste that many people do not like about mushrooms.

The more you cook with whole foods, the more you and your family will crave the healthy choices over the cholesterol laden choices.  For additional recipes check out vegweb for anything from appetizers to slow cooker meals.

The next post will be more recipes and information regarding supplements, vitamins and natural remedies for kiddo's on a plant based diet.


Monday, March 11, 2013

Kid Approved Snacks


Nothing makes me happier then when my girls ask for healthy snacks.  Hearing "mom can you make avocado dip" or "mom can you make some green juice" gets me sprinting to the kitchen so I can get started on creating foods and drinks that heal and strengthen their bodies.

Whole foods contain so many vitamins, minerals, antioxidants and phytonutrients that it only makes sense to put these amazing foods in front of children.  Starting children early on the purest foods and drinks possible increases their immune system and provides the body with oxygen rich blood, cells, tissues and organs.  Studies show that children eating the SAD diet (Standard American Diet) are actually already developing diseases often associated with adults.  Certain cancers, diabetes, high blood pressure, high cholesterol, auto immune disorders are out of control, skin issues and heart disease are found to be forming by the time children are in high school, and the link is in what they are eating.

Many times my clients feel that they can't afford to buy organic or buy that much produce.  Here are some tips:


  • The EWG (Environmental Working Group) gives a list of the dirty dozen and clean fifteen to let people know which items should definitely be organic and which ones you can go conventional on.  Knowing this little trick would help with the family budget.  
  • Cutting back or eliminating meat, cheese, cow milk and processed foods would allow the food budget to expand to buy all the necessary whole foods a family needs.  
  • Creating a weekly meal plan also helps to stay on budget and, most importantly, the money you will save on less doctors visits and prescription medicine is the ultimate goal in having your family eating more whole foods.


Today's recipes are snacks that are kid approved from all three of my children, and they are easy enough for them to do most of the work.

Apple Sandwiches
Ingredients:
1 organic apple
2-3 Tbsp. nut or seed butter of choice
pure orange juice
optional add in's - cinnamon, shredded coconut, dehydrated buckwheat groats, granola, raisins, etc.

Directions:
1.  Using a safe knife or safe mandolin, slice the apple into rings.
2.  Place the slices in a shallow bowl with enough orange juice to just cover the slices, this will help to keep the apples from browning.
3.  Dab the apple slices on a paper towel to remove excess liquid and to help the butter stay on the apples.
4.  Spread 1/2 - 1 tablespoon on one slice, if using add in's, place them on top of butter.
5.  Place another apple slice on top of butter and/or add on's and repeat until all slices are used.  Pour orange juice into a glass to drink along side the apple sandwiches.


Dehydrated Fruit or Veggies
Ingredients:
fruit or veggie of choice (sliced very thin, seeds removed)
optional add in's - spices of choice (cinnamon, garlic powder, onion powder, chili powder, etc.)

Directions:
1.  If using spices, sprinkle over each slice.
2.  Place slices in single layers on dehydrator trays.
3.  Dehydrate on 115 for 4+ hours.  Check slices after 4 hours, if you want them crispier, dehydrate longer until they suit your taste.
4.  Store in an airtight container or bag.  If any moisture is left, and they won't be consumed within a week, you may want to store them in the fridge.

Note - you can find inexpensive dehydrators at Bed, Bath & Beyond, Target, Walmart.  Dehydrating fruits and veggies make great snacks to take on road or airplane trips.


Energy Truffles
Ingredients:
2 c. raw cashews (*sunflower seeds for those w/ nut allergies)
2 c. pitted dates
optional add in's - 1/4 c. dark chocolate, 1/4 c. coconut shreds, 1 tsp. cinnamon, lemon or orange zest, etc.

Directions:
1. Soak cashews in a bowl of purified water for about 4 hours (if using sunflower seeds soak 1-2 hours), drain and allow to dry slightly.  This step isn't necessary but makes for a softer truffle and helps those with digestion issues.
2.  Place cashews in food processor and grind into small chunks.
3.  Add dates and any add in's and process until a thick sticky ball starts to form.
4.  Turn off machine and start to scoop out a tablespoon at a time and roll into a ball.  Place on a parchment lined cookie sheet.  Repeat until all dough is used.
5.  Place tray in the fridge or freezer to firm and then enjoy.

*Even if you don't have an allergy to cashews, using sunflower seeds in place of nuts can be an extremely cost effective alternative.  For example - at Trader Joes a 1 lb. bag of raw cashews is $6.99 vs. a 1 lb. bag of raw sunflower seeds is $1.99.

This isn't to say that children should never have treats such as cookies, cupcakes or candy, but as the word states, those should be treats, not an everyday thing.  These are just a few recipe options to help get you started on snacks that are healthy, simple, and taste amazing.  The next few posts will be more foods that the kiddos will love so check back soon!

Thursday, February 21, 2013

Compassionate Raw Milk


In our house we refer to all faux animal foods and drinks as compassionate.  It's a personal thing, my children and I have a difficult time saying faux or fake because, it is real food, it's just not from an animal.  So when you see the words compassionate, it means just that.  To put it another way... "no animals were harmed in the making of this product :)" and that always puts a smile on our faces.

With our journey further and further into the raw arena, we started making our own compassionate raw milks.  Not only did we find out that it's super easy, but it's so much fun to create an array of delicious flavors.  Often people avoid trying raw recipes because they think it's too complicated and takes too long.  What takes long is when you need to soak or dehydrate items.  I'll let you in on a little secret... timing is everything.  What I mean is, if you know a recipe requires nuts or seeds to soak for 12 hours, then soak them before going to bed and they are ready to go when you wake up.   You didn't do a thing and it didn't interfere with your time because you were getting your beauty sleep while the water and nuts did all the hard work.  Same goes for dehydrating, if you're making something for dinner and it takes 4-5 hours to dehydrate, get them ready and place in the dehydrator after you've finished your lunch.  Meal planning takes the stress out of already busy schedules.

Preparing your own milk allows you to flavor them how you choose and it keeps the ingredients more whole and less processed.  You can also change up which types of milk you make.  One week you may want almond milk, the next you might prefer coconut and don't forget all the delicious flavors you can create.  Use your imagination to come up with all sorts of taste bud pleasers such as strawberry, cinnamon, chocolate, banana, I could go on and on.  Okay, I won't keep you waiting any longer...

Unsweetened Almond Milk

Ingredients:
1 c. raw almonds (soaked 10-12 hours)
2 1/2 -3 c. filtered water (the more water you use, the thinner it will be.  It would be like a skim milk version the more water you use.  I personally use 3 cups).

Directions:
1.  After nuts have soaked, rinse them and place the water and nuts into a high speed blender.
2.  Process until smooth.
3.  Place a mesh strainer, nut milk bag or cheese cloth over a bowl or pitcher and slowly pour the mixture through the strainer or cloth.
4.  Squeeze the stainer or cloth to get all the liquid.  What's left in the bowl or pitcher is your milk.  Use the left over nut pulp for baking (it's best to dehydrate it first, then you can store it in an airtight container until ready to use).
5.  Place milk in the fridge for 3-4 days.  It may separate so just give it a stir before each use.

Tip = you may want to pour it through a strainer or cloth a second time if you want to be extra sure there's no pulp.


Chocolate Almond Milk

Ingredients:
1 recipe of unsweetened almond milk
3-4 Tbsp. raw cacao powder
1-2 Tbsp. raw agave or 6 pitted dates

Directions:
1. Follow instructions above. If using dates, process them with the nuts then move to step 2.
2.  Once milk has been through the strainer or cloth, pour milk back into blender and add cacao and agave.
3.  Process until well mixed.  Pour into pitcher and store in the fridge for 3-4 days.  Stir before each use.


Cinnamon Almond Milk

Ingredients:
1 recipe of unsweetened almond milk
1 Tbsp. ground cinnamon
1 tsp. pure vanilla extract or 1 vanilla bean
1 Tbsp. raw agave or 6 pitted dates

Directions:
1.  Follow directions for unsweetened almond milk.
2.  Once nuts, and if using dates, have gone through strainer or cloth, place milk back into blender and add cinnamon, vanilla and agave.
3.  Process until well mixed.  Store in the fridge 3-4 days.  Mix before each use.


Unsweetened Coconut Milk

Ingredients:
1 c. shredded unsweetened coconut meat
2 c. filtered water

Directions:
1.  Place coconut and water in a high speed blender, process until smooth.  Serve as is or pour through a strainer or cloth.
2.  Store in the fridge for 3-4 days.  Mix before each use.


Strawberry Coconut Milk

Ingredients:
1 recipe of unsweetened coconut milk
1/2 - 1 c. organic strawberries (hulls removed)
1 Tbsp. raw agave or 6 pitted dates (process dates with coconut)

Directions:
1.  Follow instructions for unsweetened coconut milk recipe.
2.  If straining, pour mix back into blender then add strawberries and agave.
3.  Process until smooth.  Store in the fridge 3-4 days.  Mix before each use.

You can experiment using different nuts or seeds in place of the almonds.  Soaking nuts and seeds allow them to soften so, once blended, they create a creamier milk.  Feel free to share any other flavor combinations you try, I would love to hear about them and enjoy those compassionate milk mustaches!


Wednesday, February 13, 2013

Valentine's Day Treats Made With Love


Valentine's Day is finally upon us.  This is a day when most people are more aware of their feelings, words, emotions and actions (if we could only live like everyday were Valentine's Day).  This is also a day of giving sweet gifts to represent our affections.  While giving and receiving sweet treats is always a nice feeling, giving and receiving treats made with pure ingredients can make us feel even better, literally.  I understand that not everyone may be handy in the kitchen so I have included some amazing sites at the end of the post to visit where you can purchase confections that are made with pure ingredients and no extra garbage added.  By garbage I mean all those ingredients that no one even knows how to pronounce and all those wonderful dye's that studies have shown to be counter productive at helping those with ADHD, known carcinogens, inflammation makers and asthma inducers.  If all that sounds yummy to you then, by all means, grab the cheap and convenient grocery store candies and treats.  For me, I think I'll stick to making my own or purchasing chemical free varieties.

Believe me, I understand that money does not grow on trees and buying the chemical free versions may be a little pricey.  However, it is still sugar so although it may be fun, it is not necessary.  There are tons of other fun ways to show your love without going the sweet treat route.  Target or The Dollar Tree have cute and fun holiday themed items you can give your little love bunnies.  You can make up a bag or basket full of Valentine socks, coloring books, books, erasers, picture frames, games or even $5 dollar gift cards to the book store or department stores.  For those that are feeling adventurous, I have included some of my favorite recipes to try, so get your pen and paper to start that Valentine grocery list.

Chocolate Candies

You can use any candy molds you like, of course hearts, roses or lips would be appropriate for Valentine's Day (Michael's, Target, Walmart, etc. sell tons of different designs and they are low cost and can be reused).

Ingredients:
2 Tbsp. coconut oil (you can use any oil you choose, try to avoid corn and peanut oil)
2/3 c. cocoa, cacao or carob powder
2 Tbsp. agave nectar or pure maple syrup (that means no Aunt Jemima or Mrs. Butterworth, Costco sells both the agave and pure maple syrup for a very reasonable price)

Directions:
1.  If using coconut oil, melt over medium heat.
2.  Once melted, add powder and agave, whisk until heated and well incorporated.  Do not let it boil.
3.  Remove from heat and allow to cool for a minute or so.
4.  Using a small spoon begin to fill the molds all the way to the top.
5.  Place in the fridge or freezer to set.
6.  Once completely set, they should just pop right out.  Flip mold upside down and gently push the plastic or silicon side to help it out.  Store in cute holiday themed baggies, boxes or tins in the fridge or freezer until ready to give.

Tip = if you don't want to buy candy molds, you can always use mini muffin tins.  Place cupcake or candy liners in the tin before filling with the chocolate.


Sugar Cookies

Ingredients:
2 1/2 c. all purpose GF flour
2 tsp. baking powder, aluminum free
1/2 tsp. salt
1 c. coconut sugar
2 tsp. pure vanilla extract (not imitation, again, Costco sells a big bottle for like $4)
1 c. vegan margarine (most grocery stores carry the Earth Balance brand which is amazing)

Directions:
1.  Prepare two cookie sheets with parchment paper, set aside and preheat oven to 350.
2.  In a medium bowl combine flour, baking powder and salt, whisk to incorporate.
3.  In a large bowl cream sugar, vanilla and margarine together until smooth.
4.  Gradually add dry ingredients, really work at incorporating before trying to add any liquids (if you still thinks it's too dry, add non-dairy milk one tablespoon at a time until you get a firm dough that holds together).
5.  Divide the dough into two equal balls, place on plastic wrap push it down to form a disc shape.  Wrap it tight and place in the fridge for at least an hour.
6.  Remove one disc at a time to start creating your cookies.
7.  Place dough between two sheets of parchment paper (this allows you to work the dough without adding more flour).  Roll it out to about 3/4 inch thick and cut out your shapes.
8.  With a spatula, place on a parchment prepared cookie sheet.
9.  Bake about 10 minutes or until cookies start to brown slightly.  Remove from oven, place on a cooling rack.  Cool completely before decorating.

Chocolate Dipping Sauce

Ingredients:
1 bag of non-dairy chocolate chips (Enjoy Life makes a great allergy friendly brand found at most grocery stores).
Anything you want to dip (organic strawberries, vegan marshmallows, GF pretzels, etc.)

Directions:
1.  Melt the chocolate over medium heat, watch carefully, whisking often, do not let it boil.
2.  Once melted, remove from heat, allow to cool for a minute.
3.  Place parchment paper on a cookie sheet and start dipping.  Allow excess chocolate to drip off and place on cookie sheet.  Place in the fridge to set and store in holiday themed bags, boxes or tins in the fridge until ready to give.

Creating your own colored dyes is not as difficult as it may seem.  Do you notice how vibrant and beautiful the colors of fruits and veggies are?  What about the spices in your cupboard?  Well those are nature's dye's at your disposal.  I have experimented with every piece of produce and spice imaginable. To quickly get the liquid rainbow you can juice beets for red and pink, blueberries for purple, cherries or strawberries for pink, spinach for green, cinnamon or cocoa powder for browns and tans, turmeric for yellows, sweet potatoes for orange, the list goes on and on.  Depending on how deep of a color you want will depend on how much liquid dye you add to the frosting recipe.  One thing to keep in mind, hold off on adding any other liquids like non-dairy milk, vanilla or water until you see how much color you add.  Once you have the color you can slowly, one teaspoon at a time, add any additional liquids until you have the frosting consistency you like.

If you don't have a juicer, you can place the produce in a pot and heat over medium heat, reduce to low until the colors release into a liquid.  Run the water through a mesh strainer to catch the produce or any of it's pulp left behind. The colors may not be as vibrant as the pure juiced form.

Which ever method you use, be sure to use the left over pulp or pieces in dinner, muffins or bread (you can freeze the pulp and pieces to use later).  Most of the dyes will not even be tasted in the frosting.  A few of the sweet fruits and spices do leave a touch of added flavor (like the strawberries, blueberries, cinnamon).  If you're worried about the spinach and beets, I swear, you cannot taste them in the frosting.

Okay, here is the frosting recipe...

Cookie Frosting

If you only want white frosting, you will use the recipe as is.

Ingredients:
1/2 c. vegan margarine
1/2 tsp. pure vanilla extract (remember to not add this yet if using dyes)
2 c. organic powdered sugar
1-2 Tbsp. nondairy milk (don't add it yet if using dyes)

Directions:
1.  Using a stand or hand held mixer, combine margarine and sugar.  Mix well.
2.  Start adding dye a few drops at a time, mixing well in between until you have the color you want.  If you need to add more liquid, now you can add the vanilla and/or milk.
3.  Frost cookies to your hearts desire.  Store in an airtight container in the fridge or freezer if not eating right away.

Tip = Store any leftover dyes in a covered ice cube tray for easy access next time you need them.

Last, but not least, here are some websites to check out if you want to purchase already made treats.
http://www.naturalcandystore.com
http://www.amazon.com

Many grocery stores carry candies, gummies and other treats that are free of disease causing ingredients. Yummy Earth, Surf Sweets and Annie's Homegrown are a few to try.  The most important thing you can do for your family is to start reading the ingredients listed.  If you cannot pronounce the the items listed chances are, you're better off skipping it altogether.  I may sound harpy to some, but with childhood obesity, ADHD, skin rashes, asthma, allergies and diabeties on the rise, taking the time to learn about what's in your food in the best proactive approach at safeguarding yourself and your loved ones and once those medical bills and visits start to decrease you'll see that added bonus.  So in the end, you actually will be saving you money.

Tuesday, February 5, 2013

Raw "Chicken" Salad

Eating whole raw vegan foods such as; whole veggies, whole fruits, sprouts, whole grains, nuts and seeds is best for optimal health.  However, mixing up these foods to create healthy options for some of our favorites gives you all the whole raw vegan food benefits while offering a wide variety of amazing flavor combinations.

Growing up, one of my all time favorite meals was a chicken salad sandwich.  Once on the journey into a compassionate life, I quickly learned to create vegan chicken salad, which is delicious!  Then onto a gluten free vegan life, so next came tempeh chicken salad and my continued happiness.  With my continued exploration into healthier options, via raw goodness, I have come up with a raw version of "chicken" salad that I thought I would share.

Raw "Chicken" Salad

Ingredients:
for salad...
*1 1/4 c. raw nuts of choice (walnuts or pecans work best)
1 Tbsp. flax oil
1/4 c. raw broccoli florets
2 large organic carrots, cut into large pieces
2 organic celery stalks, cut into large pieces
1/2 organic bell pepper, seeds removed
1/4 tsp. black pepper
1/4 tsp. himalayan salt
1/4 tsp. chili powder
1 c. quinoa sprouts or buckwheat groats that have been soaked and dehydrated (buckwheat is GF)

for mayo...
1/2 c. filtered water
*1 1/2 c. raw nuts, soaked at least 3 hours (macadamia, brazil or cashew work best)
3 Tbsp. flax oil
2 Tbsp. apple cider vinegar or pure lemon juice
1 tsp. mustard powder
1/2 tsp. himalayan salt
pinch of chili powder or black pepper
1 tsp. dried basil (optional)


Directions:
for salad...
1.  Place all ingredients except quinoa or buckwheat into food processor and pulse until it resembles a coarse, crumbly mixture.  Be careful not to over process or you'll end up with a raw vegan pate (which wouldn't be the end of the world :)
2.  Scrap mixture into a large bowl, fold in quinoa or buckwheat and set aside.

for mayo...
1.  Place all ingredients into high speed blender or food processor, process until smooth and creamy.
2.  If mixture is too thick you can add additional water, one tablespoon at a time, until you reach the consistency you like.
3.  Pour as much of the mayo you want over the salad and mix well.  If there's any left over, store in an airtight container in the fridge.


Tip = this can be served in large organic greens as a wrap, on top of a regular salad or spread on some flax crackers.

*For anyone with nut allergies, you can substitute the nuts with seeds.  Try subbing pumpkin seeds in the salad and sesame or sunflower seeds in the mayo.

Enjoy!!


Friday, January 25, 2013

Zucchini Lasagna & Donut Holes


Sticking with the raw theme, today's recipe uses zucchini instead of pasta and tastes so fresh that I guarantee you go back for seconds!

Raw Zucchini Lasagna

Ingredients:
2-3 large organic zucchini, sliced long and thin (similar to lasagna)
1 1/2 organic red bell pepper, sliced into strips
1 c. sprouted quinoa or soaked wild rice (optional)

For Sauce:
4 large gourmet tomatoes, cored
1 tsp. garlic, minced
1/4 c. fresh basil, chopped
1/2 tsp. salt
1/4 tsp. black pepper
1 tsp. dried oregano
1/2 tsp. chili powder
1/2 Tbsp. flax oil or extra virgin olive oil
1-2 Tbsp. ground gluten free oats (optional, to absorb some of the juice from the tomatoes)

For Filling:
2 c. raw cashews, ground (set about 2 Tbsp. aside to sprinkle on top of lasagna)
1/2c. mushrooms, chopped
3 Tbsp. fresh basil, chopped
1/4 c. nutritional yeast
2 tsp. garlic, minced
1/2 tsp. salt
1/4 tsp. black pepper
1 tsp. chili powder
1 small onion, chopped

Directions:
1. In a high speed blender combine all ingredients for sauce, mix well, add ground oats if needed.  Set aside sauce.
2.  In blender or food processor combine all filling ingredients, pulse to combine, don't make it too mushy, you want it to be crumbly.  Set aside filling.
3.  In a casserole dish layer zucchini, spread half filling mixture over zucchini, layer red peppers, sprinkle half the quinoa or wild rice over peppers, pour half the sauce over peppers, repeat layers until all ingredients used, ending with a layer of zucchini with a little sauce spread over the top then sprinkle with 2 Tbsp. of cashew "parm".
4.  Cut into squares and serve.

This can be heated in the oven if you really need your lasagna warm.  For dessert, whip up a batch of raw donut holes!

Raw Donut Holes

Ingredients:
1 c. raw almonds
1 c. raw walnuts
3/4 c. gluten free oats
1/3 c. coconut oil (warmed in the dehydrator, on the lowest setting over the stove, or place the jar in a bowl of hot water so enough melts to measure out required amount)
1/3 c. pure maple syrup or raw agave or raw honey
1/3 c. coconut sugar
1 1/2 tsp. cinnamon

Directions:

1.  In a food processor grind almonds, walnuts and oats until it’s nice and crumbly (don't process too long or you'll end up with a nut butter).  
2.  Add oil and syrup, pulse to combine well.  Mixture should be holding together easily.   
3.  Using a spoon, melon ball scooper, or hands form donut hole size balls, place on a parchment lined cookie sheet.  
4.  On a shallow plate or bowl, combine coconut sugar and cinnamon, mix well.  
5.  Roll each ball in sugar mix, place back on cookie sheet, repeat until all of dough is used.    
6.  Place cookie sheet in fridge to allow holes to set and firm (at least 20 minutes).  

7.  Store in an airtight container in the fridge or freezer.  

I promise, this will definitely satisfy your sweet tooth!

Sunday, January 20, 2013

Home Stretch


So my oldest and I are in the home stretch of our 21 day cleanse and we have never felt sooooo good!  I highly recommend purchasing Crazy Sexy Diet, by Kris Carr.  Not only does most of the book guide you through all the reasons to eat more raw, plant based foods, but towards the back she gives you a 21 day cleanse that includes daily advice to keep you motivated.  She also offers a few recipes at the end to get you started.  Of course, you can also purchase her Crazy Sexy Kitchen cookbook that she collaborated with Chef Chad Sarno to create which gives tons of amazing recipes.  Her website, http://kriscarr.com/products/crazy-sexy-diet/, is another superb resource for anyone curious about getting their butts, pun intended, back into shape.

We have been so happy with the change we see and feel in ourselves that it's motivated us to eat more raw foods.  I've had my dehydrator out so much that it now has a permanent home on the counter top.  Our bodies, skin, cells, tissues and organs are so in love with us and with all the daily fresh juicing, salads loaded with fresh veggies and raw dressings, steamed veggies, dehydrated burgers, fruits, breads and crackers, fresh smoothies and, of course, the raw desserts!

I'm not sure what we would be classified according to raw standards, 80/20 or 60/40, but we eat raw all day until dinner, then we have a steamed dish.  The flavors of the foods and drinks are amazing and so fresh that it actually has me craving more and more fresh food.  Eating raw can seem daunting to some and boring to others, but I promise, the recipes we have been creating are nothing short of fabulous!  Just as you would any foods, adding spices, healthy fats, garlic and onion to foods is encouraged.

We thought we ate pretty healthy before, but now, we see that you can up the ante even further and why not?  By eating a variety of fresh veggies, whole grains (brown rice, quinoa, oats), nuts, seeds and beans, you will be giving your body everything it needs, it's like having a pharmacy in your fridge instead of in your medicine cabinet.

Anytime you cleanse, know that your body is literally detoxifying.  It has to get rid of all those nasty heavy metals, environmental toxins, cleanse, heal and repair the blood, cells and tissues.  With all this change it's normal, especially at the beginning, to experience fatigue, break outs or headaches.  I know this seems unpleasant to many, but once you've flushed all the toxins out you are left with crazy energy, glowing skin, healthy organs, balanced blood sugar, less inflammation and less disease.  Bottom line, a few days of discomfort to fix the damage you created vs. a lifetime of in and out of the doctors office and pouring more chemicals down the hatch to camouflage the problem and thus create more toxins, it's a vicious cycle you really want to break.

Ultimately everyone needs to decide what works for them.  Going 100% raw isn't something we plan to do anytime soon.  We like the comfort of warm meals during cold winters and allowing ourselves a sweet treat every now and then will still be on our list.  The goal for us once we've finished the cleanse is to continue having fresh green juice every morning, huge fresh salads for lunch and veggies and whole grains for dinner.  We also plan to limit fried foods and refined sugars to once in a great while and to re-visit the cleanse quarterly.

With all these incredible raw recipes, I felt it would only be right to post raw recipes over the next few weeks, be sure to check back so you can test them out for yourself.

Sunday, January 13, 2013

In This Corner...


This time of year always seems to make us feel like we're in the middle of a boxing match, with us in one corner and the flu virus in the other.  The age old "wash your hands" is a great first line of defense, however, arming your body from the inside out will keep you in the fight even longer, with you coming out on top.

Good hygiene, plenty of sleep and eating the right foods will help to ensure that your immune system is running at top speed.  The foods I will be listing should be incorporated daily, not all at once, but you get what I'm saying.  Of course fruits, veggies, healthy fats and whole grains should be eaten daily, however, there are specific foods that will give your immune system an added boost.

KO foods to keep the flu virus down for the count...

Citrus Fruits
Organic Strawberries
Oranges
Kiwi
Pineapple
Grapefruit
Avocado
Organic Kale
Organic Spinach
Mushrooms
Garlic
Cayenne
Organic Bell Peppers
Ginger
Coconut Water
Green Tea
Sweet Potatoes
Broccoli
Nuts
Seeds
Probiotics (animal free items recommended)
Flax
Flax oil
Oats
Quinoa
Chia

There is enough on this list to keep you busy preparing all kinds of creations.  For some help you can always search back through past posts for recipes that include these foods.  Now start writing that grocery list and get shopping for a stronger immune system!


Saturday, January 5, 2013

Stock Your Shelves


With New Year's resolutions still ringing in our ears, now is the time to take stock of your shelves, and I don't mean the ones in your kitchen!  March right over to those BOOK shelves and inventory what you have, this includes your cookbooks too.

Having a book to read is important for your "me" time, however, choosing books that make you feel good should be a part of that.  If all you have are Syfy, romance novels or mysteries, go outside your comfort zone and purchase some reads that will help to create better health for you and your loved ones.

Here are some suggestions to get you started...
1.  Eat To Live by Dr. Joel Fuhrman
2.  Forks Over Knives: The Plant-Based Way To Health edited by Gene Stone
3.  Forks Over Knives: The Cookbook by Del Sroufe
4.  Crazy Sexy Diet by Kris Carr
5.  Crazy Sexy Kitchen by Kris Carr w/ Chef Chad Sarno
6.  The Mindful Child by Susan Kaiser Greenland
7.  Great Gluten Free Vegan Eats by Allyson Kramer
8.  The China Study by T. Colin Campbell
9.  Skinny Bitch by Rory Freedman & Kim Barnouin
10.  Skinny Bastard by Rory Freedman & Kim Barnouin

Well these should definitely get you started and if you were looking to put a little more compassion into your kiddos book shelves you may want to try these...

1.  Steven The Vegan by Dan Bodenstein
2.  Maggie's Second Chance by Nancy Furstinger
3.  Harmony on the Farm by Sean Smith
4.  Vegan Is Love by Ruby Roth
5.  Mindful Monkey, Happy Panda by Lauren Alderfer
6.  Moody Cow Meditates by Kerry Lee MacLean
7.  Moody Cow Learns Compassion by Kerry Lee MacLean
8.  Incredible You! by Dr. Wayne W. Dyer

The first set of books listed have a ton of amazing recipe ideas so I'm certain you will not be disappointed, how can you go wrong with something that gives you "me" time and makes you feel better!

Happy Reading!

Thursday, December 27, 2012

Kick It Off Right


It's been a few weeks, but I'm back and ready to discuss the anticipated New Years resolutions.  The New Year brings about dread for some and joyful smiles for others. While celebrating the Holiday's is typically pleasing to our taste buds, it may not be so pleasing for the rest of our body.  This would be where the dread comes in for most. The gloom and guilt of all those tasty foods and drinks begins to play tricks on the mind as we desperately search for those outfits that are forgiving.  Then we trudge to the couch, dive under the safety of blankets and turn on the tube.  We soon realize that this is not making us feel better, as show after show talks about diet and exercise.  So, we turn off the tube and head to the kitchen, promising to figure out our resolutions tomorrow, and so the vicious cycle continues.

Knowing all-to-well how this cycle goes, I figured it was time to put a smile on my face as I look forward to a New Year with logical resolutions that will be long lasting. Gone are the days of strict resolutions that get broken and then make me feel even worse.  This time, I decided to kick it off right and make lifestyle changes instead. The goal of these resolutions is to make my mind, body and spirit feel better long term.

To start, on January 2nd I will begin a three day cleanse.  This will allow my body to gently flush out toxins from all the over indulging.  Of course, there are all kinds of cleanses, but I figured this way I am being kind to my body instead of sending it into shock.  If I want to later do a longer, more stringent cleanse then I can.  On the cleanse I will avoid refined sugars, flours, caffeine and high carb foods.  The basis for this cleanse will be lots of pure juice and greens.

Cleanse...

1.  Each morning, right after rising, I will do gentle stretching to get things moving, 5-10 minutes is all.
2.  I will follow this up with a large glass of tepid water with 2 Tbsp. fresh lemon juice mixed in (be ready for the sour pucker).
3.  While drinking the water, I will start prepping the ingredients for a large glass of fresh juice.  If you don't have a juicer or high speed blender, you can buy ready made juice from Costco or your local grocer (just make sure there is no added sweeteners or anything artificial and opt for more veggie juice then fruit juice).  If you don't have to prep your juice while you drink the lemon water, then use this as time for yourself (read a few pages from a book or magazine).
4.  Once ready, prepare yourself a large glass of juice (more veggies than anything else).  Drink the juice then head to the shower.  You should wait at least 30 minutes after drinking the juice before eating anything else.
5.  After I'm dressed and ready for the day, I'll make myself a fruit salad or a warm bowl of quinoa with some cinnamon and chopped dates or 1/2 tablespoon of pure maple syrup.
6.  Between breakfast and lunch I'll have a cup or two of herbal tea and do some yoga.  This will help to heal the body, mind and spirit.  Yoga doesn't have to be hours long, even just 20 minutes a day will do wonders.  Check out http://www.yogajournal.com for some ideas.
7.  For lunch, I will be having a large spinach and romaine salad.  This can be huge and I will add in all kinds of fresh veggies (organic carrots, organic bell peppers, cucumbers, tomatoes, etc.).  I will also be cooking up a large pot of quinoa and storing it in an airtight container in the fridge.  This way I can scoop out 1/4 cup to 1/2 cup anytime I want.  Quinoa is great with any meal, especially on top of salads.  Do not go over board with dressing.  Fresh, raw dressing is best and limit it to 1-2 tablespoons.  Check out http://healthyblenderrecipes.com for some great tasting dressing ideas.
8.  Between lunch and dinner, some more herbal tea and 2-3 stuffed dates (push one almond into each date and viola, stuffed dates).
9.  Dinner will be 2 large green leaves filled with chopped veggies and each leaf drizzled with 1 tablespoon of high grade balsamic vinegar, roll up the leaf and I'll have myself a wrap.  Optionally, I may have a bowl of quinoa and chopped veggies, drizzled with the balsamic vinegar.
10.  After dinner and once all the kiddos are tucked into bed, I will taking some me time by grabbing my latest read, The Mindful Child, by Susan Kaiser Greenland and head to the tub for an Epsom salt soak.

... and so, I'll continue these steps for at least 3 days and then gradually begin to add in other foods such as brown rice, gluten free pasta and beans.  With this type of cleanse I will be able to use this anytime I feel out of balance or I've over indulged, my goal will be accomplished and I'll have put a smile on my face.


Thursday, December 6, 2012

'Tis The Season


Of course you don't need me to tell you that the holiday is all around us.  Although I love seeing all the festive lights and decorations, I find the whole shopping situation a little overwhelming.  Signs hanging in store windows, commercials on the radio and television, ads in magazines and newspapers, even when on the computer, I am bombarded with sales and deals of all the latest items.

At times I find myself engulfed in all the potential gifts I think I need to purchase.  I admit I enjoy seeing the smiles on my children's faces come Christmas morning as they run to the tree to open presents.  However, more and more I am realizing that I, as many of us do, am missing the point.  Whatever your spiritual practice may be, we need to awaken to the true meaning of gifts.  It doesn't have to be all about material items and "must haves".

I won't pretend that I'm not going to buy any gifts this season, but I am pausing to pay more attention to how I feel when I'm shopping.  Instead of feeling this person "needs" this particular item, I am realizing that I am making the purchase because I "want" to. In this practice I am using more self control not to go overboard on gifts that I will be sorting through in six months to give away.  At the same time, I am encouraging my children to not feel they need everything they see.  It's hard for adults, let alone children, to acknowledge and understand the difference in wanting and needing things. I remind my children that they are fortunate to have all of their actual needs fulfilled on a daily basis.   Love, food, shelter and clothing are things they need and should feel blessed that they have.  All the other things are just wants.  I am trying to teach my children, and myself, that material items are not necessarily the best deal.

Giving and receiving gifts is always exciting, but I have noticed I feel even more excitement when I give of my time in ways that actually benefit other beings (human and animal).  Going to shelters to help, volunteering at food banks, donating to charities or giving towards the angel tree are all gifts that have far more reward than anyone can imagine.  Through activities like these, my children and I are seeing that true gifts may not always have a price tag.

Sunday, November 25, 2012

Family Time


Family time is always an important aspect of our lives, but often I find myself busy with so many other things that, before I know it, I'm climbing into bed, the day is over and I feel like I didn't "see" anyone.

With the holidays bringing even more hustle and bustle into our already overflowing schedules, it ends up feeling like there is even less time for those who matter most.

To avoid falling into the holiday trap, I have devised a way to incorporate family time while also keeping each of ourselves sane through this holiday season.

While each of us already practices yoga, we don't do it together.  So on our black board schedule, that is posted where everyone can see it, I post the time each day that we will be practicing together as a family.  Since we have varying ages, I keep it simple and 45 minutes or less.  This is a really nice way to get everyone together in a peaceful, calming environment.

Understandably, the time will not be the same everyday due to schedules, work or school, but that doesn't matter, the most important thing is that you make the time, even if it's the last ten minutes of the day.  I guarantee this will make your body and mind feel so good and, the fact that you're doing it together, makes it even better.

If you have any leery family members, ask them to be open to just a few minutes a day.  Chances are, by the end of the week, they will be enjoying the way they feel and you can start to increase it slowly.  Be sure to always start with some gentle stretching and end with a few moments of relaxation, it's up to you as to how many poses you want to put in-between.

If you're not sure about what poses or sequences to do, check out Amazon.com for some yoga tools that you may find helpful.  Bookstores are another excellent resource for yoga DVDs or books.

Creating family yoga time will be the best gift you can give to yourself and your loved ones this season!