Mornings...the dreaded buzz of the alarm going off or hearing the pitter patter of little feet coming into the bedroom. Through squinting eyes, you try to bring the clock into focus. Can it really be 6:00 am already? Shaking off the morning fog and getting the blood flowing can be a slow moving process for many. Here is a quick routine that is less than 5 minutes, will help move things along and get you ready to face the day.
1. Sit up in bed, cross legged or legs straight.
2. Making sure your sitting up nice and tall, eyes closed, take a deep breath in through the nose.
3. Slowly open the eyes while exhaling slowly through the mouth.
4. Again, inhale slowly through the nose while raising both arms above the head.
5. Interlace the fingers while above the head, really reaching through your sides.
6. With arms still overhead, exhale slowly through the mouth while gently leaning towards the right.
7. Inhaling through the nose, bringing the back in a straight line again and bringing the arms and hands back to the center overhead.
8. With arms still overhead, exhale slowly through the mouth while gently leaning towards the left.
9. Inhaling through the nose, bringing the back in a straight line again and bringing the arms and hands back to the center overhead.
10. Exhaling through the mouth, slowly bring the arms back down by your sides.
11. Slowly swing both legs to the side, bringing the feet to the floor but still sitting in bed. Slide your bottom to the edge of the bed, extend the legs out with the heels on the floor. (If there is a slight bend in the knees that is fine).
12. Inhale, bringing the arms overhead, slowly leaning forward and down, reaching the hands towards the feet (the hands do not have to touch the feet, remember this is just getting the blood flowing). Hold for 3-4 breaths.
13. Inhaling slowly walk the hands up the legs while bringing the spine upright.
14. Still sitting on the edge, bring the feet flat on the floor, knees bent. On your next exhale, turn the upper body towards the right, placing the right palm on the bed behind you, left palm placed on your right thigh. Hold for 3-4 breaths.
15. On an exhale, turning the body center, hands by the sides.
16. Repeat the twist on the opposite side, again holding for 3-4 breaths, return the body to center.
17. Place the right ankle on the left knee, hands can rest on the upper thighs and lean forward slightly, just enough to feel the stretch, hold for 3-4 breaths.
18. Inhale bring the body upright, using your hands, remove the right ankle and repeat on the opposite side.
19. Return feet flat on the floor, knees bent. Inhale through the nose, bringing the arms overhead for one last stretch through the sides and back.
20. Exhale, slowly lowering the arms to the sides. Slowly standing up and be on your way for the day.
Next time I am hoping to have a video to go along with any routines. This one is pretty easy to remember once you read over it. If you would like a longer routine, you can repeat the entire series 2-3 times or you can add your own moves to it. Just keep in mind, listen to your body, go slow and enjoy the flow.
Sunday, July 29, 2012

Wednesday, July 25, 2012
Easy Summertime Recipes

We all want to enjoy more hours of sunlight that summertime brings. Although cooking and baking up a storm is something many of us find, dare I say, fun, we also feel compelled to spend time outside taking pleasure in what seems like additional hours.
The following recipes allow you to spend less time inside and more time outside.
Un-Tuna Salad
Serves 4
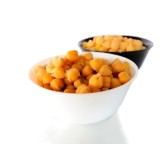
Ingredients:
2 cans or 3 1/2 c. cooked garbanzo beans (rinsed and drained)
1 red or green organic pepper (seeds and stem removed, chopped)
2 organic carrots (peeled and chopped)
1 organic celery stalk (chopped)
1 c. vegan mayo (there is a soy free option as well)
2 Tbsp. dijon mustard
1/2 tsp. salt
1/4 - 1/2 black pepper
Directions:
Place in beans in a food processor (or use a potato masher or fork). Use the pulse option on the food processor to chop the beans while still keeping texture. Once you have a crumbly texture place beans in a large bowl. Add all the chopped veggies to the beans, gently toss. In a small bowl, combine mayo, mustard, salt and pepper. Whisk to combine and then pour over bean and veggie mix. Mix to make sure it's well coated. Place a scoop on top of a salad or toast up two slices of bread, add a tomato and enjoy a sandwich. Store any leftovers in an airtight container in the fridge for up to 3 days.
Tip = if you want the sea flavor you can add 2 tsp. of kelp powder to the mayo mix before combining with the beans and veggies.
Citrus Salad
Serves 1-2

3 c. organic greens (chopped, use greens like spinach, romaine lettuce, etc.)
2 large oranges (peeled, sliced)
1/4 c. pure orange juice
1 Tbsp. white wine vinegar
1/4 c. extra virgin olive oil (can use less if you wish)
1/4 - 1/2 tsp. salt
Slice raw almonds (optional)
Directions:
Place greens in a large bowl or plate, top with orange slices. In a small bowl mix OJ, vinegar, olive oil and salt. Whisk to combine. Pour dressing over salad and top with almonds (optional). Store any extra dressing in an airtight jar in the fridge for up to 5 days.
Tip = if you want a sweeter dressing, omit the salt and add 1/2 Tbsp. agave to dressing.
Ice Cream

Ingredients:
1 1/2 c. non-dairy milk of choice
3/4 c. coconut sugar
3 c. non-dairy liquid creamer
1 1/2 Tbsp. pure vanilla
Directions:
In a large bowl combine milk and sugar, whisk until well combine or you can use an electric mixer. Add creamer and vanilla, mix until well combined. Carefully pour mixture into ice cream maker and allow to mix per machine directions (newer models take only 25 minutes). If you want to add mix-in's such as cookies, chocolate pieces, etc, add those in the last 5 minutes. Can be placed in the freezer to make it firmer before eating. Store in an airtight container in the freezer for about 6 weeks (ours never lasts that long).
Tip = ice cream makers are fairly inexpensive. Bed, Bath and Beyond carry models for $60 or less and you can use their coupons!
*At the end of the week I will be having a bonus post that covers a morning wake up routine that is less than 5 minutes.
Monday, July 16, 2012
Cooling Off
Most of us love that summer is here and enjoy being outside, feeling the sunshine on our faces, but summer heat can leave us feeling hot and exhausted. Here are a few "go to" recipes that should keep you refreshed and cool. If you have children, grandchildren or younger siblings, have them help, that's how quick and easy these recipes are.
Tropical Pops
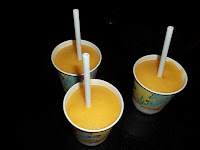
Ingredients:
16 oz. pure OJ
2 1/2 c frozen cubed mangoes
2 tsp. agave (optional)
2/3 c. non-dairy vanilla yogurt
Dixie cups
Popsicle sticks (hard plastic ones can be re-used)
Directions:
Place all ingredients into high-speed blender and process until very smooth. Pour mix into Dixie cups, almost full, place popsicle stick in center. Place cups in freezer until set (about 2 hours). To eat, just rip away the Dixie cup and enjoy. Serves about 10
Chocolate Pudding
Serves 2
Ingredients:
1/2 avocado (pit removed and skin removed)
1/4 c. non-dairy milk of choice
2 Tbsp. agave or pure maple syrup
3 Tbsp. unsweetened cocoa powder or cacao
1/2 tsp. pure vanilla extract
Directions:
Scoop avocado out of skin and place in high-speed blender or food processor. Process until smooth, add remaining ingredients and process until combined and smooth. Scrap pudding into bowl, cover and refrigerate for at least an hour. Can eat plain, use as a dip for fruits or make into frozen pudding pops.
Date Bites
Ingredients:
6 large pitted dates
6 tsp. sunflower butter
raw, unsalted almond slivers or pumpkin seeds (optional)
Directions:
Slice date in middle, but not all the way through. Spread sunflower butter down center, garnish with almond slivers or pumpkin seeds. If not eating right away, store in an airtight container in the fridge.
These recipes are so fast and yummy that I usually end up doubling or tripling the recipes to have lots on hand.
Tropical Pops

Ingredients:
16 oz. pure OJ
2 1/2 c frozen cubed mangoes
2 tsp. agave (optional)
2/3 c. non-dairy vanilla yogurt
Dixie cups
Popsicle sticks (hard plastic ones can be re-used)
Directions:
Place all ingredients into high-speed blender and process until very smooth. Pour mix into Dixie cups, almost full, place popsicle stick in center. Place cups in freezer until set (about 2 hours). To eat, just rip away the Dixie cup and enjoy. Serves about 10
Chocolate Pudding
Serves 2
Ingredients:
1/2 avocado (pit removed and skin removed)
1/4 c. non-dairy milk of choice
2 Tbsp. agave or pure maple syrup
3 Tbsp. unsweetened cocoa powder or cacao
1/2 tsp. pure vanilla extract
Directions:
Scoop avocado out of skin and place in high-speed blender or food processor. Process until smooth, add remaining ingredients and process until combined and smooth. Scrap pudding into bowl, cover and refrigerate for at least an hour. Can eat plain, use as a dip for fruits or make into frozen pudding pops.
Date Bites
Ingredients:
6 large pitted dates
6 tsp. sunflower butter
raw, unsalted almond slivers or pumpkin seeds (optional)
Directions:
Slice date in middle, but not all the way through. Spread sunflower butter down center, garnish with almond slivers or pumpkin seeds. If not eating right away, store in an airtight container in the fridge.
These recipes are so fast and yummy that I usually end up doubling or tripling the recipes to have lots on hand.
Thursday, July 5, 2012
Summer Picnic or Brunch Recipes

Summer picnics and brunches are a tasty way to spend time with family and friends. Don't forget the liquid recipes too, with this heat, dehydration can set in faster than you realize. To top the whole thing off, throw in a few water guns and water balloons and you're sure to have a fun and refreshing get-together.
Personal Pan Quiche (also gluten free)
Using a muffin tin in this recipe give you the perfect hand size quiche for a brunch or picnic.
Ingredients:
1 Tbsp. olive oil
1/2 of a small sweet onion (diced)
1/2 of an organic red pepper (diced)
1 clove garlic (minced)
1 c. organic spinach (chopped)
Handful fresh basil (chopped)
1 package firm or extra firm tofu (drained)
1/2 c. vegan mozzarella cheese (grated)
1 Tbsp. nutritional yeast
3 Tbsp. tamari
1/4 tsp. black pepper
Directions:
Preheat oven to 375. Lightly spray muffin tin, set aside. In a large skillet, add oil over medium high heat. Once heated, add onion and red pepper. Cook until soft (about 5 minutes), add garlic, cook another minute. Remove from heat, add black pepper, spinach and basil, stir well.
In a high speed blender or food processor, add tofu, cheese, nutritional yeast and tamari. Blend until smooth (you may need to scrap down the sides and blend again). Add tofu mix to skillet and mix well. With ice cream scooper, fill each about half full until all mixture has been used. Place in oven, bake 25- 30 minutes. Tops should be browned. Remove and allow to cool slightly before serving.
Potato Salad (gluten free)
Ingredients:
 10 medium yellow or red organic potatoes (quartered, unpeeled)
3/4 c. vegan mayo
1 Tbsp. dijon mustard
2 large organic carrots (peeled and chopped)
2 stalks organic celery (chopped)
Handful fresh chives (chopped)
1 Tbsp. fresh lemon juice
1 Tbsp. salt
1/2 tsp. black pepper
Directions:
Place quartered potatoes in large pot. Bring to a boil. Reduce heat to medium and cook for 10-15 minutes (until tender, but too soft or it will become mushy). Remove from heat, drain and rinse with cold water, set aside. In a large bowl, mix all other ingredients, whisk until well incorporated. Once potatoes cool, cut into cubes, add to the large bowl and gently stir until well coated. Serve immediately or cover and refrigerate.
Sugar Cookies (gluten free, nut free, soy free)
The best thing about sugar cookies is that you can use them for any occasion just by changing which cut-out you choose. Of course, for summer festivities, star cookies were the preferred cut-out this time around.
Ingredients:
 3 c. Bob's Gluten Free All Purpose Flour
1 flax egg (1 Tbsp. ground flax meal whisked well with 3 Tbsp. water)
3/4 tsp. baking powder
1/4 tsp. salt
1 c. coconut sugar
1 c. organic vegetable shortening (spectrum is a good one)
3 Tbsp. rice milk
1 tsp. pure vanilla extract (gluten free)
water (optional)
dye-free sugar crystals (optional)
Directions:
Prepare flax egg and set aside. Line 2 baking sheets with parchment paper, set aside. In a medium bowl mix all flours, baking powder and salt, whisk well. In a large bowl combine sugar and shortening, cream together until well incorporated, mix in flax egg, milk and vanilla. Combine until fluffy. Slowly add dry ingredients, mix well. Divide dough into 2 balls, place in large Ziploc bags, flatten slightly. Place in refrigerator for at least an hour. When ready, preheat oven to 375. Take out one bag at a time. With confectioners sugar, lightly dust clean surface area (may want to spread out parchment paper to roll out dough). Roll dough until 1/4 inch thick and use preferred cutouts. Place on prepared cookie sheets, brush each cookie with a little water, sprinkle with sugar crystals and bake for about 10 minutes. Continue until all dough is used. Allow cookies to cool for a minute before moving to a cooling rack. Once completely cooled, store in an airtight container.
Flavored Ice Cubes
Ingredients:
assortment of fruits or veggies (washed, de-stemmed, peeled if necessary and cut)
Directions:
Place fruit or veggies by itself or into preferred groupings (i.e, strawberries and blueberries together or lemon and lime, etc) into food processor. Puree until liquid, pour into ice cube trays and freeze. As they melt in your drinks, they give a great added flavor instead of tasting watered down.
Energizing Water
 Ingredients:
48-64 oz. of distilled water
assortment of fruits (organic strawberries, organic blueberries, organic apples, organic grapes, oranges, lemons, limes, really anything goes) or veggies (cucumbers, organic carrots, etc.)
ice or flavored ice
Directions:
Wash and thinly slice fruits or veggies (peels can be left on). Fill pitcher with water, add fruits or veggies, add ice and serve. This is really easy, but super refreshing on those hot, sticky days.
Cut up extra fruits and throw them in a large bowl for a fruit salad and you're sure to stay nice and cool.
Monday, June 25, 2012
More recipe ideas
If you have never given quinoa a chance, I highly recommend you do. If you have and didn't like it, please be open to trying it again. Quinoa is such a versatile "grain", it can be used in savory dishes, sweetened for desserts, used in baked dishes or eaten as breakfast cereal.
The trick to great tasting quinoa it to make sure you rinse it prior to cooking. Some brands pre-rinse theirs so you might be able to skip this. If you do need to rinse it, it is very simple. Soak the amount you are using in water, making sure the water covers all of it. Soak for a least 10 minutes and then rinse well with a mesh strainer under cold water. Once rinsed, place one part quinoa with two parts water. Bring to a boil, reduce heat to medium low, cover and allow to cook 10-15 minutes or until water has been absorbed. I usually cook extra and store any unused in the fridge in an airtight container so I can use it at breakfast or put 1/4 cup on salads.
Quinoa is an amazing "grain" that has been used for thousands of years. Considered a superfood, this grain is not actually a grain, but rather, a seed. Quinoa is an amazing source of protein and is a complete protein, as it contains the nine essential amino acids that our body needs. It is also a good source of calcium, phosphorus, iron, potassium and zinc. As if all this wasn't enough, quinoa is vegan and gluten free so put it in and on everything. On the home page is my quinoa, black bean and tomato recipe that is really a meal in itself, but the following recipes are pretty darn good too. Once cooked, you can eat this wonderful food cold or hot so cook up a bunch and get creative.
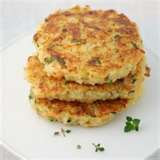 Gluten Free Quinoa Patties
Ingredients:
3 c. cooked quinoa
2 flax "eggs" (2 Tbsp. ground flax meal whisked with 6 Tbsp. water)
2 c. gluten free/vegan bread crumbs or corn meal
1/4 onion, chopped
1 Tbsp. fresh basil or 1 tsp. dried
1/2 block vegan gourmet monterey jack cheese, shredded
1/4 tsp. black pepper
1/2 tsp. salt
olive oil
Directions:
In skillet, heat 1 tsp. oil and cook onion until tender. Remove from heat and place all ingredients, except olive oil, in a large bowl. Mix well, it should be slightly sticky. Form into patties. In a large skillet, heat oil over medium heat. Once heated, place 5-6 patties in skillet. Heat about 5 minutes per side or until each side is golden brown. Remove and place on plate and repeat process until all patties are cooked. Serve with sides of steamed veggies and a small baked potato. Can also make a sauce, such as teriyaki, to drizzle on patties.
Hot Quinoa Cereal
 Ingredients:
1/2 c. cooked quinoa (warmed if using leftover quinoa)
1/2 tsp. cinnamon
1/2 Tbsp. coconut sugar, agave or pure maple syrup
2-4 Tbsp. non-dairy milk of choice
2 Tbsp. walnuts or pecans
Directions:
Place all ingredients in cereal bowl, mix well and enjoy.
 Chocolate Quinoa Truffles
Ingredients:
1/2 c. cooked quinoa
3 Tbsp. unsweetened cocoa powder
2 Tbsp. agave or pure maple syrup
1/2 tsp. cinnamon
1 Tbsp. almond butter
1 tsp. non-dairy milk
Directions:
Combine all ingredients through almond butter. Mixing well, add non-dairy milk, you should have a sticky consistency that can be shaped or scooped into balls. With melon scooper, place on cookie sheet lined with parchment paper. Place in fridge for at least an hour. Drizzle with chocolate sauce optional (see recipe below). These taste like heavenly dark chocolate. If you like a sweeter chocolate, add an extra tablespoon agave and omit the milk.
Chocolate Sauce
Ingredients:
1 Tbsp. unsweetened cocoa powder
1 Tbsp. agave or pure maple syrup
Directions:
Whisk powder and agave until well incorporated. It will take some mixing to get the powder absorbed. Drizzle over truffles, place in fridge.
There are so many ways to incorporate quinoa into your day. There is also quinoa flour which works really well in cupcakes, breads, muffins, waffles and so much more. Experiment with different ways to use quinoa, try is as filling in peppers or making burgers or hummus. I am certain you will enjoy introducing this "superfood" into your diet.
The trick to great tasting quinoa it to make sure you rinse it prior to cooking. Some brands pre-rinse theirs so you might be able to skip this. If you do need to rinse it, it is very simple. Soak the amount you are using in water, making sure the water covers all of it. Soak for a least 10 minutes and then rinse well with a mesh strainer under cold water. Once rinsed, place one part quinoa with two parts water. Bring to a boil, reduce heat to medium low, cover and allow to cook 10-15 minutes or until water has been absorbed. I usually cook extra and store any unused in the fridge in an airtight container so I can use it at breakfast or put 1/4 cup on salads.
Quinoa is an amazing "grain" that has been used for thousands of years. Considered a superfood, this grain is not actually a grain, but rather, a seed. Quinoa is an amazing source of protein and is a complete protein, as it contains the nine essential amino acids that our body needs. It is also a good source of calcium, phosphorus, iron, potassium and zinc. As if all this wasn't enough, quinoa is vegan and gluten free so put it in and on everything. On the home page is my quinoa, black bean and tomato recipe that is really a meal in itself, but the following recipes are pretty darn good too. Once cooked, you can eat this wonderful food cold or hot so cook up a bunch and get creative.
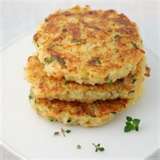 Gluten Free Quinoa Patties
Ingredients:
3 c. cooked quinoa
2 flax "eggs" (2 Tbsp. ground flax meal whisked with 6 Tbsp. water)
2 c. gluten free/vegan bread crumbs or corn meal
1/4 onion, chopped
1 Tbsp. fresh basil or 1 tsp. dried
1/2 block vegan gourmet monterey jack cheese, shredded
1/4 tsp. black pepper
1/2 tsp. salt
olive oil
Directions:
In skillet, heat 1 tsp. oil and cook onion until tender. Remove from heat and place all ingredients, except olive oil, in a large bowl. Mix well, it should be slightly sticky. Form into patties. In a large skillet, heat oil over medium heat. Once heated, place 5-6 patties in skillet. Heat about 5 minutes per side or until each side is golden brown. Remove and place on plate and repeat process until all patties are cooked. Serve with sides of steamed veggies and a small baked potato. Can also make a sauce, such as teriyaki, to drizzle on patties.
Hot Quinoa Cereal
Ingredients:1/2 c. cooked quinoa (warmed if using leftover quinoa)
1/2 tsp. cinnamon
1/2 Tbsp. coconut sugar, agave or pure maple syrup
2-4 Tbsp. non-dairy milk of choice
2 Tbsp. walnuts or pecans
Directions:
Place all ingredients in cereal bowl, mix well and enjoy.
 Chocolate Quinoa Truffles
Ingredients:
1/2 c. cooked quinoa
3 Tbsp. unsweetened cocoa powder
2 Tbsp. agave or pure maple syrup
1/2 tsp. cinnamon
1 Tbsp. almond butter
1 tsp. non-dairy milk
Directions:
Combine all ingredients through almond butter. Mixing well, add non-dairy milk, you should have a sticky consistency that can be shaped or scooped into balls. With melon scooper, place on cookie sheet lined with parchment paper. Place in fridge for at least an hour. Drizzle with chocolate sauce optional (see recipe below). These taste like heavenly dark chocolate. If you like a sweeter chocolate, add an extra tablespoon agave and omit the milk.
Chocolate Sauce
Ingredients:
1 Tbsp. unsweetened cocoa powder
1 Tbsp. agave or pure maple syrup
Directions:
Whisk powder and agave until well incorporated. It will take some mixing to get the powder absorbed. Drizzle over truffles, place in fridge.
There are so many ways to incorporate quinoa into your day. There is also quinoa flour which works really well in cupcakes, breads, muffins, waffles and so much more. Experiment with different ways to use quinoa, try is as filling in peppers or making burgers or hummus. I am certain you will enjoy introducing this "superfood" into your diet.
Friday, June 22, 2012
Vegan & Gluten Free Recipes
The next few posts will be recipes that focus on gluten free ideas. When people have dietary modifications cooking and baking can seem overwhelming. This feeling can take the fun out of getting in the kitchen, but as you will see, cooking and baking for a gluten free vegan lifestyle is not as hard as you may think. Instead of reaching for the prepackaged items, take a breath, put on the trusty apron and get back to creating your own masterpieces. Not only will you have tremendous satisfaction, but you will feel healthier too (not to mention the savings to the wallet as well!)
First up... Large salad with teriyaki tofu (teriyaki tofu recipe comes from the Peas and Thank You cookbook by Sarah Matheny)
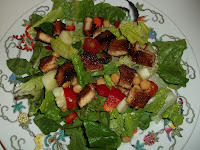 Ingredients for tofu:
1 tub of extra firm tofu, drained and pressed & cut into 2x3 inch slabs
1/2 c. tamari
1/4 c. plus 2 Tbsp. water
2 Tbsp. mirin or seasoned rice vinegar
1 tsp. minced garlic (or 1/4 tsp. garlic powder)
2 tsp. minced ginger (or 1/2 tsp. dry ginger)
1/4 c. coconut sugar
1 Tbsp. cornstarch (or arrowroot)
Directions:
Place prepared tofu in a wide, shallow dish. Whisk cornstarch and 2 Tbsp of water in a separate bowl and set aside. In a medium saucepan, combine all other ingredients. Heat saucepan over med. high heat, whisking occasionally until sugars dissolve. Once sugars have dissolved, and sauce starts to boil, add cornstarch mix, whisk and set to simmer until sauce thickens. Remove from heat, pour 1/2 of sauce over tofu, making sure each is well coated. Allow to marinate for at least 30 minutes. This sauce is so good that I always double it and keep the rest in the fridge to use as dressing.
Once marinated, preheat boiler to high, place marinated tofu on lightly sprayed cookie sheet. Broil 6-7 minutes per side. Should be crisp on the outside, but DO NOT BURN. Cut into bite size pieces.
Ingredients for salad:
3 - 4 c. organic greens, rinsed and cut
1/2 c. garbanzo beans (drained and rinsed or previously prepared dried beans)
1/2 organic red bell or green pepper, chopped
2 large organic carrots, peeled and chopped
1/2 cucumber, peeled and chopped
Directions:
Combine all ingredients plus teriyaki tofu. Add a drizzle of additional teriyaki or 1 Tbsp. of your dressing of choice. This salad is so good!
To satisfy a sweet tooth craving, try the chocolate energy bars that I previously posted. In case you missed it, here is the recipe again.
Raw Energy Bars
Ingredients:
2 c. raw unsalted cashews (or almonds)
2 c. pitted dates
1/2 c. enjoy life chocolate chips
Directions:
Process cashews in food processor until finely ground, add dates and chips and process until sticky mass forms. With spatula, scrap mix into 8x8 pan lined with parchment paper. With another piece of parchment, push mix into pan until even. Cover and refrigerate at least 30 minutes. Remove and cut into 12-16 bars. These can be placed in snack size baggies, then into large freezer bag and put in the freezer. Take out one a day to enjoy. How easy was this recipe?!
Next post will include comfort food recipe, breakfast recipe and a drink recipe.
First up... Large salad with teriyaki tofu (teriyaki tofu recipe comes from the Peas and Thank You cookbook by Sarah Matheny)
 Ingredients for tofu:
1 tub of extra firm tofu, drained and pressed & cut into 2x3 inch slabs
1/2 c. tamari
1/4 c. plus 2 Tbsp. water
2 Tbsp. mirin or seasoned rice vinegar
1 tsp. minced garlic (or 1/4 tsp. garlic powder)
2 tsp. minced ginger (or 1/2 tsp. dry ginger)
1/4 c. coconut sugar
1 Tbsp. cornstarch (or arrowroot)
Directions:
Place prepared tofu in a wide, shallow dish. Whisk cornstarch and 2 Tbsp of water in a separate bowl and set aside. In a medium saucepan, combine all other ingredients. Heat saucepan over med. high heat, whisking occasionally until sugars dissolve. Once sugars have dissolved, and sauce starts to boil, add cornstarch mix, whisk and set to simmer until sauce thickens. Remove from heat, pour 1/2 of sauce over tofu, making sure each is well coated. Allow to marinate for at least 30 minutes. This sauce is so good that I always double it and keep the rest in the fridge to use as dressing.
Once marinated, preheat boiler to high, place marinated tofu on lightly sprayed cookie sheet. Broil 6-7 minutes per side. Should be crisp on the outside, but DO NOT BURN. Cut into bite size pieces.
Ingredients for salad:
3 - 4 c. organic greens, rinsed and cut
1/2 c. garbanzo beans (drained and rinsed or previously prepared dried beans)
1/2 organic red bell or green pepper, chopped
2 large organic carrots, peeled and chopped
1/2 cucumber, peeled and chopped
Directions:
Combine all ingredients plus teriyaki tofu. Add a drizzle of additional teriyaki or 1 Tbsp. of your dressing of choice. This salad is so good!
To satisfy a sweet tooth craving, try the chocolate energy bars that I previously posted. In case you missed it, here is the recipe again.
Raw Energy Bars
Ingredients:
2 c. raw unsalted cashews (or almonds)
2 c. pitted dates
1/2 c. enjoy life chocolate chips
Directions:
Process cashews in food processor until finely ground, add dates and chips and process until sticky mass forms. With spatula, scrap mix into 8x8 pan lined with parchment paper. With another piece of parchment, push mix into pan until even. Cover and refrigerate at least 30 minutes. Remove and cut into 12-16 bars. These can be placed in snack size baggies, then into large freezer bag and put in the freezer. Take out one a day to enjoy. How easy was this recipe?!
Next post will include comfort food recipe, breakfast recipe and a drink recipe.
Wednesday, June 13, 2012
Gluten Free Flour Mixes
Gluten allergies or intolerance can have serious affects on the body. Not only can it cause gas, bloating, diarrhea or abdominal pain, studies have also linked it to skin issues, certain forms of arthritis, diabetes, fibromyalgia and other autoimmune disorders. With this being said, going gluten free for a week or two to see how you feel is worth your time.
To help get you started I have listed some mixes to try. There are several different GF mixes to use depending on how sweet, savory or nutty tasting you want your recipes. If you live near Whole Foods you can find all the GF flours you need and most are priced reasonably. Kroger carries a few, but the prices can get high for some items. Another option is to stock up and order through Vitacost.com, the prices are extremely reasonable. If you order $50 or more, shipping is free (and they carry all kinds of things so you can get other items you might need as well). There is also Amazon.com, prices are fair and the order may qualify for free shipping.
The following mixes are what I use, but play around with them for yourself and see what works for you. With the exception of the cupcakes/cakes, these are done by 1 cup mixes. If something calls for 2 or 3 cups then you'll need to adjust accordingly.
Pancakes/Waffles:
1/4 c Tapioca Flour
1/4 c GF Certified Oat Flour or Sweet Sorghum Flour
1/4 c Amaranth Flour or Millet Flour
1/4 c Quinoa Flour
Cookies:
1/4 c Tapioca Flour
1/4 c Sweet Sorghum Flour
1/4 c Amaranth Flour
1/4 c Garbanzo Bean Flour
or
1/4 c Tapioca Flour
1/4 c Sweet Sorghum Flour
1/4 c Almond Flour or GF Oat Flour
1/4 c Quinoa Flour
Cupcakes/Cakes (makes 12 cupcakes or one 9 inch single layer cake):
1/4 c Tapioca Flour
1/3 c Almond Flour
1/2 c Sweet Sorghum Flour
1/2 c Quinoa Flour
For all recipes I have eliminated xatham or guar gum. Instead, I use 1 Tbsp. flax meal with 3 Tbsp. water and mix until thick, you can use a mixer, blender or food processor. This is also a great substitute for any recipes calling for eggs (this would equal one egg). Have fun playing with recipes and take notice how you feel after avoiding gluten for awhile. I am certain even those that don't suffer from Celiac will still feel positive changes.
To help get you started I have listed some mixes to try. There are several different GF mixes to use depending on how sweet, savory or nutty tasting you want your recipes. If you live near Whole Foods you can find all the GF flours you need and most are priced reasonably. Kroger carries a few, but the prices can get high for some items. Another option is to stock up and order through Vitacost.com, the prices are extremely reasonable. If you order $50 or more, shipping is free (and they carry all kinds of things so you can get other items you might need as well). There is also Amazon.com, prices are fair and the order may qualify for free shipping.
The following mixes are what I use, but play around with them for yourself and see what works for you. With the exception of the cupcakes/cakes, these are done by 1 cup mixes. If something calls for 2 or 3 cups then you'll need to adjust accordingly.
Pancakes/Waffles:
1/4 c Tapioca Flour
1/4 c GF Certified Oat Flour or Sweet Sorghum Flour
1/4 c Amaranth Flour or Millet Flour
1/4 c Quinoa Flour
Cookies:
1/4 c Tapioca Flour
1/4 c Sweet Sorghum Flour
1/4 c Amaranth Flour
1/4 c Garbanzo Bean Flour
or
1/4 c Tapioca Flour
1/4 c Sweet Sorghum Flour
1/4 c Almond Flour or GF Oat Flour
1/4 c Quinoa Flour
Cupcakes/Cakes (makes 12 cupcakes or one 9 inch single layer cake):
1/4 c Tapioca Flour
1/3 c Almond Flour
1/2 c Sweet Sorghum Flour
1/2 c Quinoa Flour
For all recipes I have eliminated xatham or guar gum. Instead, I use 1 Tbsp. flax meal with 3 Tbsp. water and mix until thick, you can use a mixer, blender or food processor. This is also a great substitute for any recipes calling for eggs (this would equal one egg). Have fun playing with recipes and take notice how you feel after avoiding gluten for awhile. I am certain even those that don't suffer from Celiac will still feel positive changes.
Thursday, June 7, 2012
Gluten Free Trial
Well, time to get back on track with things. Even though it's been a laid back summer so far, with all the kids home I easily seem to run out of hours in the day.
As I've posted in the past, I have family members who have celiac and cannot eat any foods or beverages that contain gluten. Due to this, I am used to creating foods that they can eat. I actually enjoy trying to come up with new recipes that taste amazing and hold together. I have had my middle child tested, but my oldest is the one who has asked for no more gluten foods. Although she has not been tested, she is old enough to realize when foods are causing her discomfort and she notices how she feels when she avoids certain things. We have not consumed gluten pastas for some time and we all notice how much better we feel after our pasta dinners (not feeling bloated for one). Chips and cereals are another that we get gluten free. Of course, we consume a lot of fruits and veggies and those are naturally GF, but every now and then we like to have some sweet treats and that seems to be our downfall. So our GF trial begins...
The goal seems simple, eliminate all GF items, but believe me, they sneak it in everywhere, you would be surprised. So in order to accomplish this task, it seems logical that I would make things myself. This way I was sure they would be vegan and GF. As if this doesn't seem daunting enough, my daughter was adamant that she did not want to gain weight going GF. For some reason, many GF items are very high in carbs. So getting out my detective gear, I set to work trying to figure out the culprits and remove them as quickly as possible.
It didn't take long on the ingredient list to figure out who the trouble makers were, white rice flour and brown rice flour. I am not trying to talk badly about rice flours, but when you look at the facts, it adds up pretty fast as to why people can gain weight on GF diets, especially if they like their breads and sweets. Without getting too technical here are the facts. Generally, rice flours contain 32g of carbs per 1/4 cup, where regular all-purpose wheat flour contains 22g per 1/4 cup. That is a 10g difference per 1/4 cup. That is huge considering most recipes will call for 2-3 cups total for the recipe, add that up! You're talking 80g+ per recipe of additional carbs. Won't take long to pack on the pounds if you're used to have 2 slices of toast at breakfast and a sandwich for lunch.
First item on the list, replace rice flours with another GF flour. There are a ton; GF certified oat flour, millet flour, amaranth, sweet sorghum, tapioca, coconut, almond and the list goes on. Although the coconut and almond are low in carb, they are higher in fat. With that being said, if you just add 1/4 cup in a recipe or two you'll be okay and you'll be getting some healthy fats. I have come to realize, if I replace one cup of rice flour with a mixture of 4 different flours (1/4 cup each), the recipes turn out awesome. Depending on how sweet or savory the recipe will determine what mixes you use. I also avoid using xanthum or guar gum which seems to be a staple in all GF recipes. People seem to think they must use these for recipes to hold together, well I can tell you that is not true. I am having so much fun creating new recipes and the kids are enjoying taste testing them! Check back soon as my next few posts will give flour mixture recipes, meal recipes, sweet treat recipes and the secret ingredient I use instead of xanthum or guar gum.
As I've posted in the past, I have family members who have celiac and cannot eat any foods or beverages that contain gluten. Due to this, I am used to creating foods that they can eat. I actually enjoy trying to come up with new recipes that taste amazing and hold together. I have had my middle child tested, but my oldest is the one who has asked for no more gluten foods. Although she has not been tested, she is old enough to realize when foods are causing her discomfort and she notices how she feels when she avoids certain things. We have not consumed gluten pastas for some time and we all notice how much better we feel after our pasta dinners (not feeling bloated for one). Chips and cereals are another that we get gluten free. Of course, we consume a lot of fruits and veggies and those are naturally GF, but every now and then we like to have some sweet treats and that seems to be our downfall. So our GF trial begins...
The goal seems simple, eliminate all GF items, but believe me, they sneak it in everywhere, you would be surprised. So in order to accomplish this task, it seems logical that I would make things myself. This way I was sure they would be vegan and GF. As if this doesn't seem daunting enough, my daughter was adamant that she did not want to gain weight going GF. For some reason, many GF items are very high in carbs. So getting out my detective gear, I set to work trying to figure out the culprits and remove them as quickly as possible.
It didn't take long on the ingredient list to figure out who the trouble makers were, white rice flour and brown rice flour. I am not trying to talk badly about rice flours, but when you look at the facts, it adds up pretty fast as to why people can gain weight on GF diets, especially if they like their breads and sweets. Without getting too technical here are the facts. Generally, rice flours contain 32g of carbs per 1/4 cup, where regular all-purpose wheat flour contains 22g per 1/4 cup. That is a 10g difference per 1/4 cup. That is huge considering most recipes will call for 2-3 cups total for the recipe, add that up! You're talking 80g+ per recipe of additional carbs. Won't take long to pack on the pounds if you're used to have 2 slices of toast at breakfast and a sandwich for lunch.
First item on the list, replace rice flours with another GF flour. There are a ton; GF certified oat flour, millet flour, amaranth, sweet sorghum, tapioca, coconut, almond and the list goes on. Although the coconut and almond are low in carb, they are higher in fat. With that being said, if you just add 1/4 cup in a recipe or two you'll be okay and you'll be getting some healthy fats. I have come to realize, if I replace one cup of rice flour with a mixture of 4 different flours (1/4 cup each), the recipes turn out awesome. Depending on how sweet or savory the recipe will determine what mixes you use. I also avoid using xanthum or guar gum which seems to be a staple in all GF recipes. People seem to think they must use these for recipes to hold together, well I can tell you that is not true. I am having so much fun creating new recipes and the kids are enjoying taste testing them! Check back soon as my next few posts will give flour mixture recipes, meal recipes, sweet treat recipes and the secret ingredient I use instead of xanthum or guar gum.
Tuesday, May 22, 2012
To Be Happy You Need To Let Go
This article is from a link my sister was so kind to share. I have attached the link as well, http://www.purposefairy.com/3308/15-things-you-should-give-up-in-order-to-be-happy/. If you wish for happiness, as most people do, then take the first step by reading this article. The only thing holding you back from being truly happy is YOU, so let down the walls and let the journey begin.
15 Things You Should Give Up To Be Happy

Here is a list of 15 things which, if you give up on them, will make your life a lot easier and much, much happier. We hold on to so many things that cause us a great deal of pain, stress and suffering – and instead of letting them all go, instead of allowing ourselves to be stress free and happy – we cling on to them. Not anymore. Starting today we will give up on all those things that no longer serve us, and we will embrace change. Ready? Here we go:
1. GIVE UP YOUR NEED TO ALWAYS BE RIGHT
There are so many of us who can’t stand the idea of being wrong – wanting to always be right – even at the risk of ending great relationships or causing a great deal of stress and pain, for us and for others. It’s just not worth it. Whenever you feel the ‘urgent’ need to jump into a fight over who is right and who is wrong, ask yourself this question: “Would I rather be right, or would I rather be kind?” Wayne Dyer. What difference will that make? Is your ego really that big?
2. GIVE UP YOUR NEED FOR CONTROL
Be willing to give up your need to always control everything that happens to you and around you – situations, events, people, etc. Whether they are loved ones, coworkers, or just strangers you meet on the street – just allow them to be. Allow everything and everyone to be just as they are and you will see how much better will that make you feel.
“By letting it go it all gets done. The world is won by those who let it go. But when you try and try. The world is beyond winning.” Lao Tzu
3. GIVE UP ON BLAME
Give up on your need to blame others for what you have or don’t have, for what you feel or don’t feel. Stop giving your powers away and start taking responsibility for your life.
4. GIVE UP YOUR SELF-DEFEATING SELF-TALK
Oh my. How many people are hurting themselves because of their negative, polluted and repetitive self-defeating mindset? Don’t believe everything that your mind is telling you – especially if it’s negative and self-defeating. You are better than that.
“The mind is a superb instrument if used rightly. Used wrongly, however, it becomes very destructive.” Eckhart Tolle
5. GIVE UP YOUR LIMITING BELIEFS
about what you can or cannot do, about what is possible or impossible. From now on, you are no longer going to allow your limiting beliefs to keep you stuck in the wrong place. Spread your wings and fly!
“A belief is not an idea held by the mind, it is an idea that holds the mind” Elly Roselle
6. GIVE UP COMPLAINING
Give up your constant need to complain about those many, many, maaany things – people, situations, events that make you unhappy, sad and depressed. Nobody can make you unhappy, no situation can make you sad or miserable unless you allow it to. It’s not the situation that triggers those feelings in you, but how you choose to look at it. Never underestimate the power of positive thinking.
7. GIVE UP THE LUXURY OF CRITICISM
Give up your need to criticize things, events or people that are different than you. We are all different, yet we are all the same. We all want to be happy, we all want to love and be loved and we all want to be understood. We all want something, and something is wished by us all.
8. GIVE UP YOUR NEED TO IMPRESS OTHERS
Stop trying so hard to be something that you’re not just to make others like you. It doesn’t work this way. The moment you stop trying so hard to be something that you’re not, the moment you take off all your masks, the moment you accept and embrace the real you, you will find people will be drawn to you, effortlessly.
9. GIVE UP YOUR RESISTANCE TO CHANGE
Change is good. Change will help you move from A to B. Change will help you make improvements in your life and also the lives of those around you. Follow your bliss, embrace change – don’t resist it.
“Follow your bliss and the universe will open doors for you where there were only walls” Joseph Campbell
“Follow your bliss and the universe will open doors for you where there were only walls” Joseph Campbell
10. GIVE UP LABELS
Stop labeling those things, people or events that you don’t understand as being weird or different and try opening your mind, little by little. Minds only work when open. “The highest form of ignorance is when you reject something you don’t know anything about.” Wayne Dyer
11. GIVE UP ON YOUR FEARS
Fear is just an illusion, it doesn’t exist – you created it. It’s all in your mind. Correct the inside and the outside will fall into place.
“The only thing we have to fear, is fear itself.” Franklin D. Roosevelt
“The only thing we have to fear, is fear itself.” Franklin D. Roosevelt
12. GIVE UP YOUR EXCUSES
Send them packing and tell them they’re fired. You no longer need them. A lot of times we limit ourselves because of the many excuses we use. Instead of growing and working on improving ourselves and our lives, we get stuck, lying to ourselves, using all kind of excuses – excuses that 99.9% of the time are not even real.
13. GIVE UP THE PAST
I know, I know. It’s hard. Especially when the past looks so much better than the present and the future looks so frightening, but you have to take into consideration the fact that the present moment is all you have and all you will ever have. The past you are now longing for – the past that you are now dreaming about – was ignored by you when it was present. Stop deluding yourself. Be present in everything you do and enjoy life. After all life is a journey not a destination. Have a clear vision for the future, prepare yourself, but always be present in the now.
14. GIVE UP ATTACHMENT
This is a concept that, for most of us is so hard to grasp and I have to tell you that it was for me too, (it still is) but it’s not something impossible. You get better and better at with time and practice. The moment you detach yourself from all things, (and that doesn’t mean you give up your love for them – because love and attachment have nothing to do with one another, attachment comes from a place of fear, while love… well, real love is pure, kind, and self less, where there is love there can’t be fear, and because of that, attachment and love cannot coexist) you become so peaceful, so tolerant, so kind, and so serene. You will get to a place where you will be able to understand all things without even trying. A state beyond words.
15. GIVE UP LIVING YOUR LIFE TO OTHER PEOPLE’S EXPECTATIONS
Way too many people are living a life that is not theirs to live. They live their lives according to what others think is best for them, they live their lives according to what their parents think is best for them, to what their friends, their enemies and their teachers, their government and the media think is best for them. They ignore their inner voice, that inner calling. They are so busy with pleasing everybody, with living up to other people’s expectations, that they lose control over their lives. They forget what makes them happy, what they want, what they need….and eventually they forget about themselves. You have one life – this one right now – you must live it, own it, and especially don’t let other people’s opinions distract you from your path.
Thursday, May 10, 2012
Why?

It amazes me how much money and time people and, parents in particular, will spend on the latest fashion statement, the coolest clubs, the quickest meal or the newest gadgets. When I look around at all the busy lifestyles and the rushing from activity A to activity B, I wonder what it's all about. I think it's important not to judge people on how they look or what they do, but I find myself disturbed by all the materialistic "necessities" society is shoving in our faces and our children's faces. Why do they need the latest phone? Why do they need to join the most hip club? Why must they be involved in 10 different activities, to the point that they have no down time? When I think about all of this I find peace in the simplest answer, yoga. Yoga is not only good for the physical aspect, but also for the mental and emotional aspects. Yoga does not have to be anything fancy. You don't need to practice yoga in a 1000 sq. foot studio decorated like a famous town out of India. Yoga offers guidance in the smallest of places and can be done in the private of your own home. Yoga practice doesn't have to last for hours. Practicing as little as 10 minutes a day will have lasting positive effects. When I see all the rushing and materialistic madness, I find solace in my practice because it helps me to let go of all the "whys" and allows me to focus on what matters. My only hope is that others will realize the gift yoga can give, not only for themselves but for their children. Showing children that it's okay to slow down, center and focus is an invaluable gift to give them, worth far more than any outfit or gadget can give.
Friday, April 20, 2012
Sharing Yoga

I truly feel blessed to be able to share yoga with so many people. Yoga should be enjoyed by everyone of all ages and all physical capabilities.
Each and every experience is a gift and teaches me so much. I have seen first hand how yoga is valued by those in wheelchairs. Yoga allows them movement that they never thought possible and helps to alleviate pain and stiffness that they normally feel. It is pure enjoyment watching the smile spread across their face when, using a strap, they are able to lift their leg to a position that they have not been able to do for some time.
Watching toddlers and children experience yoga for the first time is magical. It's almost as if you can see the wheels turning inside their minds, absorbing and taking it all in. Then it clicks and they start doing the poses and you can see their will and concentration to do the pose the best they can.
I am amazed at how tweens and teens will come into a room, full of giggles and feelings of awkwardness. The transformation in them by the time the class ends is incredible. You can see they are intrigued through the questions they ask at the end and in how calmly and quietly they walk out of the room.
Yoga is a special tool that can create amazing connections within yourself and with others, no matter what their age or level of experience may be.
Monday, April 16, 2012
Spring Cleaning Part 3

For the dinner ideas I refer back to some previous posted recipes that my family loves...
Recipe 1: Quinoa, Black Bean and Tomatoes
1 Tbs. extra virgin olive oil
1 small onion (finely chopped)
2 cloves garlic (finely chopped)
Half sweet red pepper (finely chopped)
black beans (1 15oz. can drained and rinsed or 1 cup dried beans that have been soaked and cooked, that's the best choice).
1 cup quinoa (follow package directions)
1 15oz. can diced tomatoes
1-2 Tbs. chili powder (just depends on your spice preference)
salt
Before hand, cook quinoa according to package. It's best to soak quinoa first, rinse it in a mesh strainer, add fresh water and then cook accordingly. For beans, if using dried, beans should be soaked and cooked the day prior. I like doing large batches and then freezing them in smaller portions so they are readily available. In a pinch, canned beans work just as well.
In a large skillet heat oil over medium heat. Add onion, garlic and red pepper until tender (3-5 minutes). Add the diced tomatoes, cook for 3 minutes. Add the cooked black beans and chili powder. Stir everything and then add in the cooked quinoa, stir again. Salt to preference.

Recipe 2: Gluten Free Pasta with Steamed Veggies and Balsamic Sauce
1 box of gluten free pasta (we prefer Jovial, capellini style)
Assorted veggies, washed and sliced (broccoli, squash, zucchini, tomatoes, etc)
1/4 C. high quality balsamic vinegar (found at most grocery stores or specialty stores)
1/4 C. extra virgin olive oil
salt/pepper to taste
Cook pasta according to package directions. As pasta cooks, steam all prepared veggies for about 7 minutes. Remove pasta, drain and gently rinse, return to pan and place over low heat. Add veggies on top, gently toss. Add balsamic, oil, salt and pepper, toss again. Leave on the burner just to heat through, tossing to make sure the pasta does not burn. Remove from heat and serve.
 Recipe 3: Tortilla Pizza's
1 package of tortilla's (GF or sprouted is best, try Ezekiel or Silver Hills brands found in the freezer section. If that is not available choose a whole grain option).
Olive oil
Assorted veggies of your choice, washed
Pasta sauce or hummus
Nutritional Yeast or Vegan cheese of your choice (Follow Your Heart, shredded or Daiya)
Salt/pepper to taste
Preheat oven to 325 F. While preheating, cut veggies and steam for about 5-7 minutes. Remove from heat and set aside. While veggies steam, lightly brush oil on the top side of each tortilla. Place tortilla on a cookie sheet and in oven to slightly crisp, 1-2 minutes. Remove from oven. If using sauce, spread with sauce, top with veggies and a little cheese. Tortilla can be placed back in the oven for another minute to melt cheese. If using hummus, spread tortilla with hummus, top with veggies and a little cheese (not recommended to place back in oven if using hummus). Salt and pepper to taste. Using pizza cutter, cut into four slices. Repeat process until everyone has their own personal tortilla pizza. *You can also do this on the grill, but oil both sides of the tortilla prior to placing on the grill.
This may round out the menu portion of the series, but don't forget to pamper the outside of your body with homemade spa treatments (for some ideas, try http://vegan.sheknows.com/2011/05/24/diy-vegan-beauty-treatments/).
Last, but not least, getting exercise is a must in getting yourself back on the healthy track. There are so many options, not just limited to going to the gym. Join a local group that walks a least 3 times a week or start your own group, take some yoga classes or buy some yoga videos to get started on self healing, get going on your garden, even if you live in an apartment, you can still plant items in smaller pots or window boxes, volunteer to help clean up neighborhoods or walk other people's dogs, this will not only get you exercising, but will also be good for your soul. The options are limitless on how you can get your exercise in, just like with your meals, get creative to find new ways to exercise to avoid the "burnt out from boredom" excuse. Most of all, have fun on your new spring cleaning adventure!
Wednesday, April 11, 2012
Spring Cleaning Part 2
The Spring Cleaning series continues with some lunch and additional snack ideas to make you feel better starting from the inside. You will notice you have lasting energy instead of dragging half way through the day. However, come night time, you should notice you are actually sleeping better.
No matter how busy you are, lunch should never be skipped because it will only lead to making poor eating choices later in the day. If skipping meals has become routine, you are doing more harm than good and slowing your metabolism so that foods you do consume take longer to turn into energy and will be more likely to linger in places you don't want. All day long, drink plenty of water or green tea. Stocking up on lots of greens to make a different salad for everyday of the week will leave you satisfied and not bored with your meals. You will also want to stock up on various veggies and beans. For tips on using dried beans check out a previous post from 3/16 "White Bean & Tomato Soup", at the bottom I walk you through easy bean preparation.
Lunch Recipe 1:
 Large bunch of organic romaine lettuce
Large handful of organic spinach
1/4 C. cooked garbanzo beans
Diced red pepper
Diced carrots
Diced cucumbers
Diced tomatoes
2 Tbsp. Homemade dressing or store bought brand of your choice (Whole Foods 365 brand has a great Organic Italian and it's only $1.99 per bottle!)
Wash all veggies, spin dry. Assemble ingredients in large bowl and top with dressing. Use dressing sparingly so you don't sabotage all the cleaning your doing.
Recipe 2:
Large bunch of organic arugula
Large bunch of organic spinach
1/4 C. cooked black beans
Diced green pepper
Dice onion
Diced tomatoes
1/4 C. cooked and cooled organic corn
1/4 C. salsa of your choice
Wash all veggies, spin dry. Assemble ingredients in large bowl and top with salsa.
Recipe 3:
Large bunch of organic spring mix
Large bunch of organic spinach
1/4 C. cooked white beans
1/4 C. dried cranberries
2 Tbsp. slivered almonds
Diced red peppers
2 Tbsp. balsamic vinaigrette dressing
Wash all veggies, spin dry. Assemble in a large bowl, top with vinaigrette.
Just as with juicing, mix up ingredients and different greens, add beets or strawberries, get creative. It may seem like a huge bowl of food, but I assure you, as long as you don't drown it in dressing, you will still be consuming less calories and fat than before, but feeling full in the end.
More snack ideas to get you through to dinner:
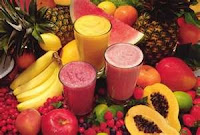 Strawberry/banana smoothie
8 oz. of plain organic soy milk
1/2 C. organic frozen strawberries
2/3 of a frozen banana
1tsp. agave
Add all ingredients, in the order listed, to a high speed blender, process until all fruit is smooth. Pour and enjoy.
Orange smoothie
8 oz. pure orange juice (if you're vegan, I suggest to skip the added calcium options as it comes from animals)
1/2 C. frozen cubed mango
1/4 C. frozen diced papaya
1 tsp. agave
Add all ingredients, in the order listed, to a high speed blender, process until smooth.
Apple with sesame seed butter
Large organic apple of your choice, cored and sliced
1-2 Tbsp. sesame seed butter (Trader Joe's has a good one)
 Popcorn with coconut oil (avoid all the added butter and the store bought popcorn bags that contain some undesirable ingredients)
1 C. organic kernels
1/3 C. high heat coconut oil
Salt optional
Place a large pot with handles and a securely fitting lid over medium heat. Allow pan to heat. Have two thick oven mitts nearby. Once pan is heated, add coconut oil and allow it to melt all the way. Once melted, add popcorn, secure lid. After about 30 seconds, with oven mitts on place thumbs on lid, hands on handles, start to gently shake the pan back and forth, side to side. Kernels will start popping within a minute or two. Continue shaking pan until popping starts to slow down and pan is 3/4 full of popped corn (should be about 5 minutes). Remove from heat, wait until you no longer hear popping. Remove lid, add salt if using, replace lid and shake. Pour into large bowl or separate bowls. Once cooled, you can store in a gallon size baggie to have throughout the week.
You should be feeling better already. Keep up the great work cleaning as part three will round out the menu with dinner ideas.
No matter how busy you are, lunch should never be skipped because it will only lead to making poor eating choices later in the day. If skipping meals has become routine, you are doing more harm than good and slowing your metabolism so that foods you do consume take longer to turn into energy and will be more likely to linger in places you don't want. All day long, drink plenty of water or green tea. Stocking up on lots of greens to make a different salad for everyday of the week will leave you satisfied and not bored with your meals. You will also want to stock up on various veggies and beans. For tips on using dried beans check out a previous post from 3/16 "White Bean & Tomato Soup", at the bottom I walk you through easy bean preparation.
Lunch Recipe 1:
Large bunch of organic romaine lettuceLarge handful of organic spinach
1/4 C. cooked garbanzo beans
Diced red pepper
Diced carrots
Diced cucumbers
Diced tomatoes
2 Tbsp. Homemade dressing or store bought brand of your choice (Whole Foods 365 brand has a great Organic Italian and it's only $1.99 per bottle!)
Wash all veggies, spin dry. Assemble ingredients in large bowl and top with dressing. Use dressing sparingly so you don't sabotage all the cleaning your doing.
Recipe 2:
Large bunch of organic arugula
Large bunch of organic spinach
1/4 C. cooked black beans
Diced green pepper
Dice onion
Diced tomatoes
1/4 C. cooked and cooled organic corn
1/4 C. salsa of your choice
Wash all veggies, spin dry. Assemble ingredients in large bowl and top with salsa.
Recipe 3:
Large bunch of organic spring mix
Large bunch of organic spinach
1/4 C. cooked white beans
1/4 C. dried cranberries
2 Tbsp. slivered almonds
Diced red peppers
2 Tbsp. balsamic vinaigrette dressing
Wash all veggies, spin dry. Assemble in a large bowl, top with vinaigrette.
Just as with juicing, mix up ingredients and different greens, add beets or strawberries, get creative. It may seem like a huge bowl of food, but I assure you, as long as you don't drown it in dressing, you will still be consuming less calories and fat than before, but feeling full in the end.
More snack ideas to get you through to dinner:
 Strawberry/banana smoothie
8 oz. of plain organic soy milk
1/2 C. organic frozen strawberries
2/3 of a frozen banana
1tsp. agave
Add all ingredients, in the order listed, to a high speed blender, process until all fruit is smooth. Pour and enjoy.
Orange smoothie
8 oz. pure orange juice (if you're vegan, I suggest to skip the added calcium options as it comes from animals)
1/2 C. frozen cubed mango
1/4 C. frozen diced papaya
1 tsp. agave
Add all ingredients, in the order listed, to a high speed blender, process until smooth.
Apple with sesame seed butter
Large organic apple of your choice, cored and sliced
1-2 Tbsp. sesame seed butter (Trader Joe's has a good one)
Popcorn with coconut oil (avoid all the added butter and the store bought popcorn bags that contain some undesirable ingredients)1 C. organic kernels
1/3 C. high heat coconut oil
Salt optional
Place a large pot with handles and a securely fitting lid over medium heat. Allow pan to heat. Have two thick oven mitts nearby. Once pan is heated, add coconut oil and allow it to melt all the way. Once melted, add popcorn, secure lid. After about 30 seconds, with oven mitts on place thumbs on lid, hands on handles, start to gently shake the pan back and forth, side to side. Kernels will start popping within a minute or two. Continue shaking pan until popping starts to slow down and pan is 3/4 full of popped corn (should be about 5 minutes). Remove from heat, wait until you no longer hear popping. Remove lid, add salt if using, replace lid and shake. Pour into large bowl or separate bowls. Once cooled, you can store in a gallon size baggie to have throughout the week.
You should be feeling better already. Keep up the great work cleaning as part three will round out the menu with dinner ideas.
Monday, April 9, 2012
Spring Cleaning Part 1
With Spring in full gear and numerous holidays still lingering on our hips, I believe the time has come for some spring cleaning. This isn't your typical cleaning regimen. The spring cleaning that needs done starts from the inside (of your body that is) and the results will show on the outside.
I know how easy it can be to succumb to all the wonderful holiday foods and sweats. So, I say, go for it, indulge, enjoy and savor all the amazing foods (especially when you know they've been made with love and are cruelty free). However, once the holiday is over, it's time to whip that body back into shape. Pull out the trusty juicer, food processor and high-speed blender, your body will thank you in the end.
First up, stock up on all the necessities such as; non-dairy milks of your choice (regular or unsweetened would be best), pure orange juice, fresh fruits and veggies (check out the EWG's list for the dirty dozen and clean 15 to see what you should buy organic or not), almond butter, agave, pure maple syrup, soy or coconut yogurt (plain or vanilla should work for most recipes, but if you must have other flavors then go right ahead) and lots of ice. Check out your local warehouse stores like Costco's or Sam's Club to stock up on some items (almond butter, granola, oranges, bananas, agave, etc), 9 times out of 10 it will be cheaper than the smaller chain stores.
Every morning should start with a healthy all veggie and/or fruit juice made from your juicer. Wait at least 30 minutes after drinking your juice before eating any other foods, especially starches. Here are some recipes that should jump start your days...
Recipe 1
 2-3 large navel oranges (or 7-8 clementines) peeled and halved to fit through juicer
3-4 large organic carrots
Place one orange through juicer followed by all the carrots, help to flush out all the carrot juice by sending the last of the oranges through the juicer. Add some ice, stir and enjoy.
Recipe 2
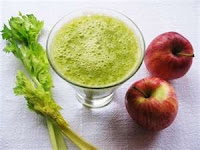 2-3 large organic apples (I prefer gala for juicing) cored and halved to fit through juicer
1 large bunch of organic greens (spinach, kale, collard greens, romaine lettuce) rinsed
Place one apple through juicer followed by all the greens (you may have to break the greens into smaller chunks so it doesn't jam the juicer) help flush all the green goodness out by juicing the remaining apples. Add some ice and stir.
Recipe 3
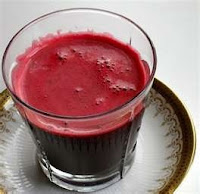 2 small Meyer lemons, peeled
1 medium beet, rinsed and halved to fit through juicer
1 large bunch of organic greens of your choice, rinsed
Send all greens through juicer (again, you may have to break them up) followed by the beets and all the lemons. This will be a tart drink so if you really don't like lemons, I suggest you use something else (pineapple or grapefruit). Add some ice and stir.
Play around with the ingredients to create your own recipes. The more you juice, you'll find the less you'll need to sweeten it with fruits and the more greens or other veggies you'll want to be adding.
Some suggestions if you are still hungry 30 minutes after juicing:
I know how easy it can be to succumb to all the wonderful holiday foods and sweats. So, I say, go for it, indulge, enjoy and savor all the amazing foods (especially when you know they've been made with love and are cruelty free). However, once the holiday is over, it's time to whip that body back into shape. Pull out the trusty juicer, food processor and high-speed blender, your body will thank you in the end.
First up, stock up on all the necessities such as; non-dairy milks of your choice (regular or unsweetened would be best), pure orange juice, fresh fruits and veggies (check out the EWG's list for the dirty dozen and clean 15 to see what you should buy organic or not), almond butter, agave, pure maple syrup, soy or coconut yogurt (plain or vanilla should work for most recipes, but if you must have other flavors then go right ahead) and lots of ice. Check out your local warehouse stores like Costco's or Sam's Club to stock up on some items (almond butter, granola, oranges, bananas, agave, etc), 9 times out of 10 it will be cheaper than the smaller chain stores.
Every morning should start with a healthy all veggie and/or fruit juice made from your juicer. Wait at least 30 minutes after drinking your juice before eating any other foods, especially starches. Here are some recipes that should jump start your days...
Recipe 1
 2-3 large navel oranges (or 7-8 clementines) peeled and halved to fit through juicer
3-4 large organic carrots
Place one orange through juicer followed by all the carrots, help to flush out all the carrot juice by sending the last of the oranges through the juicer. Add some ice, stir and enjoy.
Recipe 2
 2-3 large organic apples (I prefer gala for juicing) cored and halved to fit through juicer
1 large bunch of organic greens (spinach, kale, collard greens, romaine lettuce) rinsed
Place one apple through juicer followed by all the greens (you may have to break the greens into smaller chunks so it doesn't jam the juicer) help flush all the green goodness out by juicing the remaining apples. Add some ice and stir.
Recipe 3
 2 small Meyer lemons, peeled
1 medium beet, rinsed and halved to fit through juicer
1 large bunch of organic greens of your choice, rinsed
Send all greens through juicer (again, you may have to break them up) followed by the beets and all the lemons. This will be a tart drink so if you really don't like lemons, I suggest you use something else (pineapple or grapefruit). Add some ice and stir.
Play around with the ingredients to create your own recipes. The more you juice, you'll find the less you'll need to sweeten it with fruits and the more greens or other veggies you'll want to be adding.
Some suggestions if you are still hungry 30 minutes after juicing:
- 6 oz. non-dairy yogurt with 1 Tbsp. of granola (Nature's Path makes some pretty darn good ones) and a big bowl of your choice of fruits.
- 1/4 C. organic oats with 1/2 C. water, top with your choice non-dairy milk, cinnamon, chia seeds, 1 tsp agave and/or 2 Tbsp. walnuts.
or
- 2 slices of sprouted bread (Ezekiel brand is found in most stores, usually in the freezer section or if you live near a Trader Joe's, they have a really good flour-less sprouted bread). Top the bread with some Earth Balance coconut butter spread and brew a cup of green tea.
To help stave off over eating, you should have a small snack between breakfast and lunch and do the same for the time between lunch and dinner.
Snack suggestions between meals:
- 1 banana peeled and sliced down the center. Top with 1 Tbsp. almond butter, 2 Tbsp. granola (Nature's Path Peanut Butter Granola is amazing) and drizzle 1 tsp. agave down the center.
- 1 raw chocolate energy bar (2 C. raw, unsalted cashews, 2 C. pitted dates, 1/2 C. non-dairy semi-sweet chocolate chips. Place cashews in food processor and process into a powder, add dates and chips and process until a sticky mass forms. Press mixture into 8x11 pan, refrigerate for at least 30 minutes and cut into 12 bars).
or
- Large bowl of fresh fruit.
Stay tuned for Part 2 of the Spring Cleaning series which will focus on lunch and dinner options, but get started tomorrow on cleaning up your morning routine, you'll be surprised by the energy you still have come mid-day.
Subscribe to:
Posts (Atom)